
How to Winterize Your Home for Foundation Protection
How to Winterize Your Home for Foundation Protection
As Denver homeowners know, Colorado winters can be harsh. Freezing temperatures, snowmelt, and shifting soil conditions don’t just affect your roof and pipes—they can also take a toll on your foundation. Preparing your home before winter hits is one of the best ways to avoid costly damage in the spring.
Why Winter Matters for Your Foundation
Denver’s clay-rich soils are highly sensitive to moisture changes. When temperatures drop below freezing, water in the soil expands, creating pressure against your foundation. When it thaws, the soil contracts again. These cycles, combined with snowmelt pooling around your home, can lead to cracks, uneven settling, and water intrusion.
Steps to Winterize Your Home’s Foundation
1. Seal Cracks and Gaps
Inspect your foundation for any visible cracks before the first freeze. Small gaps can allow water to seep in, where it may freeze, expand, and worsen the damage. Use a high-quality sealant designed for masonry or concrete.
2. Maintain Proper Drainage
Make sure gutters and downspouts are clear of leaves and debris so that melting snow can flow away from your home. Downspouts should extend at least 5–10 feet away from your foundation to prevent pooling.
3. Check Grading Around Your Home
The soil around your house should slope away from the foundation. Over time, soil can settle, creating areas where water collects. Add soil if needed to re-establish a gentle slope.
4. Protect Exterior Pipes and Hose Bibs
Burst outdoor pipes can leak water directly against your foundation. Disconnect hoses, drain irrigation systems, and insulate any exposed pipes before the first hard freeze.
5. Regulate Soil Moisture
Even in winter, it’s important to keep soil moisture relatively balanced. In extended dry periods, consider lightly watering the ground around your foundation during warmer days to prevent excessive shrinkage.
6. Insulate Basement and Crawl Space Areas
Cold drafts and fluctuating temperatures can lead to condensation, which may seep into cracks and damage the foundation. Adding insulation and sealing air leaks helps maintain stable conditions.
Final Thoughts
Denver’s freeze-thaw cycles and clay-heavy soils make foundation care especially important. By winterizing your home now, you’ll reduce the risk of cracks, shifting, and water damage—and save yourself major repairs come spring.
How Can a Drought Affect your Foundation in Denver
How a Drought Can Affect Your Foundation in Denver, Colorado
Living in the Denver metro area, we’re no strangers to changing weather conditions. Between heavy snows in the winter and hot, dry summers, the soil beneath our homes experiences constant cycles of expansion and contraction. But during times of prolonged drought, these changes can be especially damaging to your home’s foundation.
The Role of Colorado’s Expansive Soils
Much of the Front Range, including Denver, sits on clay-heavy soils. These soils are known as “expansive soils” because they swell when wet and shrink when dry. When drought conditions persist, the soil around your foundation loses moisture and contracts. This creates gaps and voids beneath your home, leaving your foundation without the consistent support it needs.
Common Signs of Drought-Related Foundation Issues
When the ground dries out and pulls away from your foundation, you may notice:
Cracks forming in interior walls, ceilings, or brickwork
Doors and windows that stick or won’t close properly
Uneven or sloping floors
Gaps between your home’s foundation and the surrounding soil
These issues can worsen if sudden rain follows a drought, as the dried-out soil won’t absorb water evenly, leading to uneven pressure against your foundation.
Why Denver Homes Are at Higher Risk
Denver’s semi-arid climate and fluctuating weather patterns make local homes especially vulnerable. A hot summer with little rain can dry the soil quickly, while sudden storms or snowmelt can cause rapid re-expansion. This back-and-forth puts stress on your foundation year after year.
Protecting Your Foundation During Drought
The good news is, there are steps homeowners can take to minimize damage:
Maintain consistent moisture around your foundation by watering the soil during prolonged dry spells.
Inspect gutters and downspouts to ensure water drains properly and doesn’t pool near your home after a storm.
Schedule regular foundation inspections if you notice warning signs of shifting.
Final Thoughts
In Denver, drought is more than just a landscaping concern—it can directly impact the stability of your home. Staying proactive with foundation care during dry periods can save you from costly repairs down the road.
What are Expeditor Services?
Expeditor Services Save Time and Money!
Understanding Permit Expeditor Services: A Guide for Homeowners and Builders
Navigating the complex world of building permits can be a daunting task, whether you’re a homeowner planning a renovation or a contractor managing a large construction project. This is where permit expeditor services come into play—saving time, reducing stress, and ensuring your project complies with local regulations.
What Is a Permit Expeditor?
A permit expeditor is a professional who specializes in managing the building permit process. These experts work with local municipalities and building departments to expedite the approval of permits required for construction, renovation, and development projects. They act as liaisons between project stakeholders (such as homeowners, architects, and contractors) and regulatory bodies, ensuring that all the necessary paperwork, approvals, and inspections are handled correctly and efficiently.
The Benefits of Using a Permit Expeditor
1. Saves Time and Reduces Hassle
Obtaining permits can be time-consuming, with many applicants facing delays due to incomplete paperwork, missed steps, or complex regulations. Permit expeditors streamline the process by preparing all documentation, ensuring forms are filled out correctly, and addressing any issues that may arise during the approval process. Their experience allows them to navigate bureaucracy more efficiently, potentially saving weeks or even months of waiting.
2. Ensures Compliance with Regulations
Each municipality has specific codes, zoning laws, and ordinances that need to be followed. Permit expeditors are familiar with these local regulations, ensuring that your project complies with all relevant requirements. This reduces the risk of fines, project delays, or having to redo work that was not up to code.
3. Prevents Costly Mistakes
One of the biggest challenges in obtaining permits is ensuring that the plans and applications meet the stringent requirements set forth by local authorities. Permit expeditors review your plans in detail, helping to identify and correct any potential red flags before submission. By catching these errors early, expeditors can help prevent costly revisions, delays, and rejections.
4. Provides Expertise and Local Knowledge
A good permit expeditor has established relationships with local building departments, inspectors, and other regulatory officials. This insider knowledge allows them to anticipate potential hurdles and navigate the specific nuances of your municipality’s permitting process. Their expertise can also help to smooth over issues that might arise during inspections or reviews.
5. Improves Project Workflow
For builders and contractors, managing multiple projects at once can be overwhelming. A permit expeditor helps ensure that permits are approved on time, allowing the project to move forward without unnecessary delays. This keeps the construction schedule on track and minimizes downtime, which is especially important in larger, multi-phase developments.
When Should You Consider Using a Permit Expeditor?
There are several situations where hiring a permit expeditor makes sense:
- Complex Projects: For large-scale commercial or residential projects, or renovations involving significant structural changes, an expeditor can help navigate the complexities of local permitting processes.
- Tight Timelines: If your project has a strict timeline, such as those that need to be completed before a specific season or event, a permit expeditor can help ensure the project stays on schedule.
- Unfamiliar with Local Codes: If you’re working in a municipality you’re unfamiliar with, or if the regulations are particularly strict or complex, a permit expeditor can help avoid surprises.
How to Choose the Right Permit Expeditor
When selecting a permit expeditor, consider the following:
- Experience and Expertise: Look for professionals with a solid track record in your area and specific knowledge of your project type (residential, commercial, etc.).
- Local Relationships: Ideally, your expeditor will have established relationships with local officials, which can help expedite the process.
- References and Reputation: Check reviews, ask for references, and research their history with similar projects. A good reputation is a strong indicator of their ability to deliver.
- Clear Communication: The expeditor should keep you informed at every step of the process, explaining any potential delays or issues that arise.
Conclusion
Permit expeditor services can be invaluable for homeowners and contractors looking to streamline the permitting process, ensuring compliance, and keeping projects on schedule. By leveraging their expertise, you can avoid costly mistakes and delays, making your construction or renovation project smoother and more efficient.
Whether you’re embarking on a small renovation or a large-scale build, consider enlisting the help of a permit expeditor to ensure everything runs smoothly from start to finish.
---
Need help with architectural plans and permitting? At Architectural Plans Online, we work closely with experienced permit expeditors to ensure your project gets approved quickly and efficiently. Reach out to us today to get started on your next build!
Engineers Role in Real Estate Transactions
In the dynamic world of real estate, numerous professionals come together to ensure that a transaction proceeds smoothly. One key player, often working behind the scenes but integral to the process, is the structural engineer. Understanding their role can help buyers, sellers, and real estate agents appreciate the value they bring to the table.
Understanding Structural Engineers Role
A structural engineer is a specialized civil engineer who focuses on the framework of structures, ensuring they can withstand the stresses and pressures of their environment. They assess buildings, bridges, and other structures to ensure they are safe and stable. Their expertise is critical in identifying potential issues that could affect the integrity and safety of a building.
Pre-Purchase Inspections
One of the most common ways a structural engineer is involved in a real estate transaction is through pre-purchase inspections. When a buyer is interested in a property, they may hire a structural engineer to assess the building's condition. This inspection goes beyond the general home inspection to provide a detailed analysis of the structural components, including the foundation, load-bearing walls, beams, and roof structure.
Why it Matters:
- Safety: Ensuring the building is safe for occupancy.
- Investment Protection: Identifying any structural issues can save the buyer from unexpected repair costs in the future.
- Negotiation Power: Discovering structural problems can give the buyer leverage to negotiate a lower price or request repairs before closing.
Renovation and Remodeling
When buyers plan to renovate or remodel a property, a structural engineer's input is crucial. They assess the feasibility of proposed changes and ensure that the modifications do not compromise the building's integrity. For instance, if a buyer wants to remove a wall to create an open-plan living space, a structural engineer will determine if the wall is load-bearing and, if so, design a suitable support system.
Why it Matters:
- Safety: Prevents catastrophic failures during and after construction.
- Compliance: Ensures renovations meet local building codes and regulations.
- Cost-Efficiency: Helps avoid costly mistakes and rework.
Identifying and Mitigating Risks
Structural engineers play a pivotal role in identifying and mitigating risks associated with real estate properties. This can include assessing risks related to natural disasters like earthquakes, floods, or hurricanes, especially in areas prone to such events. They design reinforcements and suggest modifications to enhance the building's resilience against these threats.
Why it Matters:
- Safety: Enhances the building's ability to withstand natural disasters.
- Insurance: Can impact insurance premiums and coverage.
- Value: Increases the overall value and appeal of the property.
Final Thoughts
In conclusion, the role of a structural engineer in a real estate transaction is multifaceted and indispensable. Their expertise ensures the safety, stability, and longevity of buildings, protecting both the financial and personal interests of buyers, sellers, and investors. Whether through pre-purchase inspections, overseeing renovations, or new construction projects, structural engineers provide critical insights that facilitate informed decision-making and successful real estate transactions.
Understanding and appreciating their contributions can lead to safer, more secure, and ultimately more valuable real estate investments.
Modular Steel Advantages
Modular steel construction refers to a construction technique where prefabricated steel modules are fabricated off-site and transported to the construction site for assembly. This method of construction has several advantages over traditional building methods, including:
1. Speed of construction: Modular steel construction allows for quicker construction time as the steel modules are prefabricated off-site and can be assembled on site in a matter of days. This can save significant time compared to traditional construction methods, which can take months or even years.
2. Cost-effective: The use of modular steel construction can be more cost-effective than traditional construction methods due to the reduced labor and material costs associated with prefabrication.
3. Sustainability: Modular steel construction is considered a more sustainable method of construction as it produces less waste and reduces the carbon footprint associated with transportation and construction.
4. Durability: Steel is a strong and durable material that can withstand harsh weather conditions, seismic activity, and fire. This makes modular steel buildings highly resilient and long-lasting.
5. Design flexibility: Modular steel construction allows for a high degree of design flexibility, as modules can be designed to fit almost any shape or size. This flexibility allows for greater design creativity and can lead to more innovative building designs.
Overall, modular steel construction provides numerous advantages over traditional building methods, including speed of construction, cost-effectiveness, sustainability, durability, and design flexibility.
Steel Fabrication - Phase 2
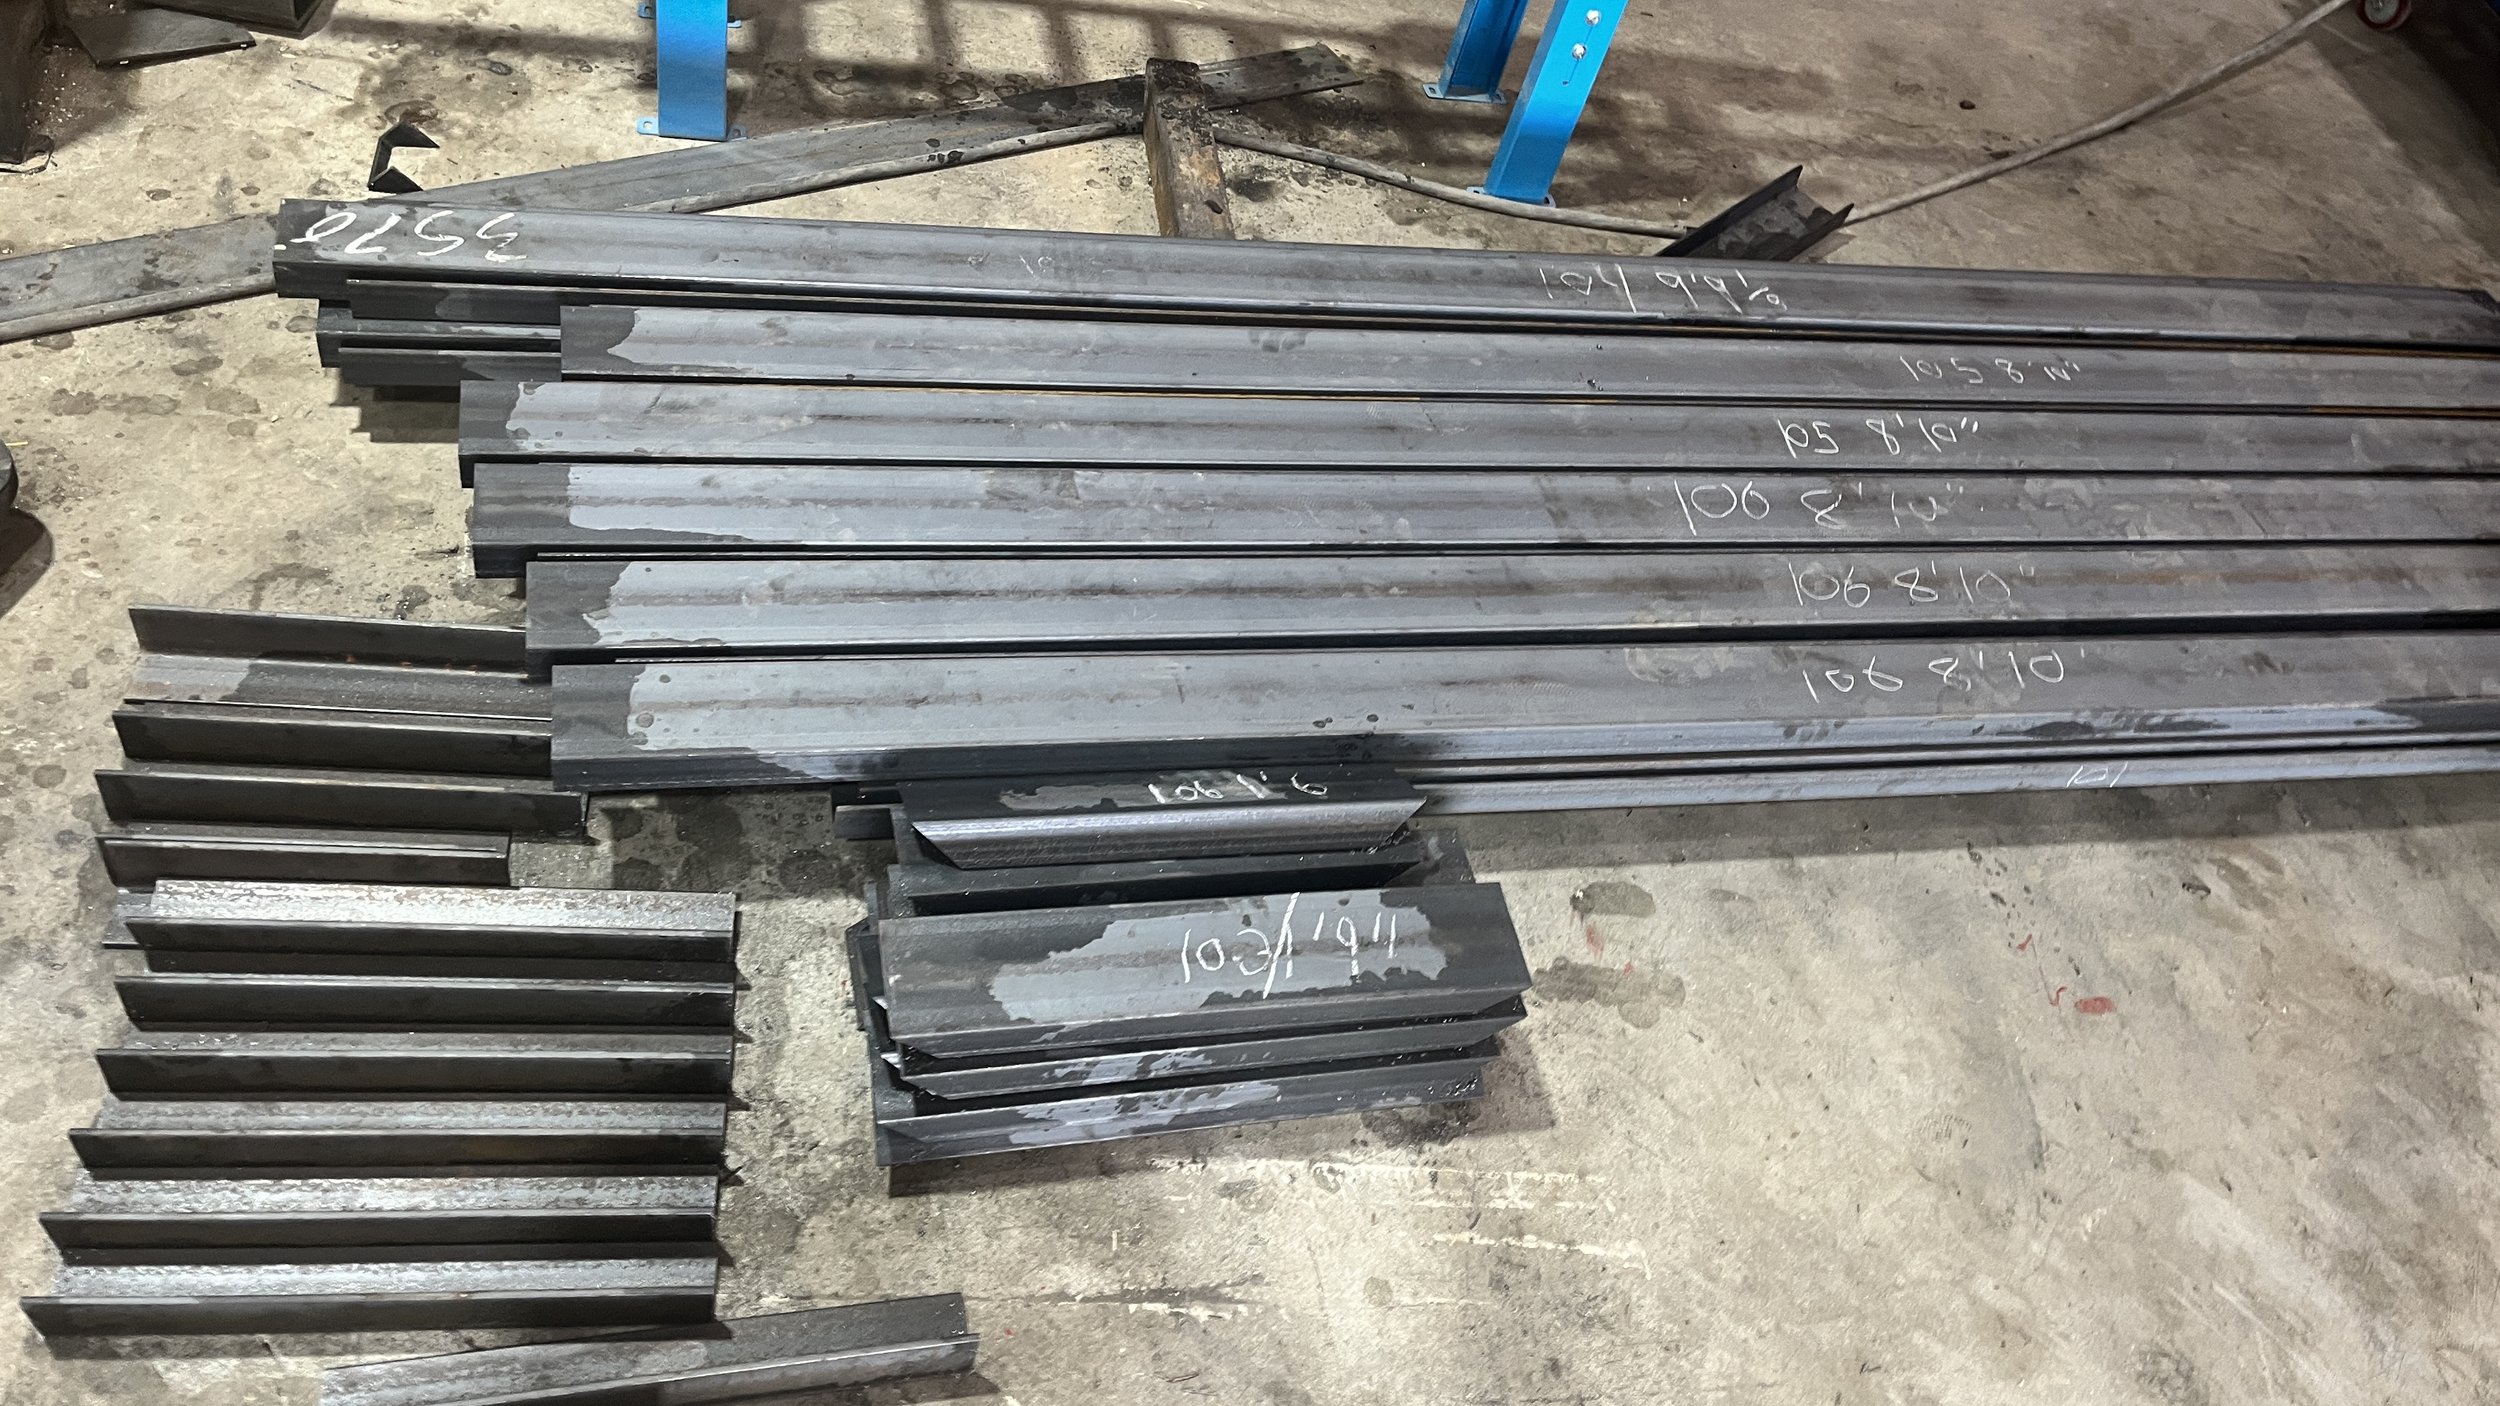
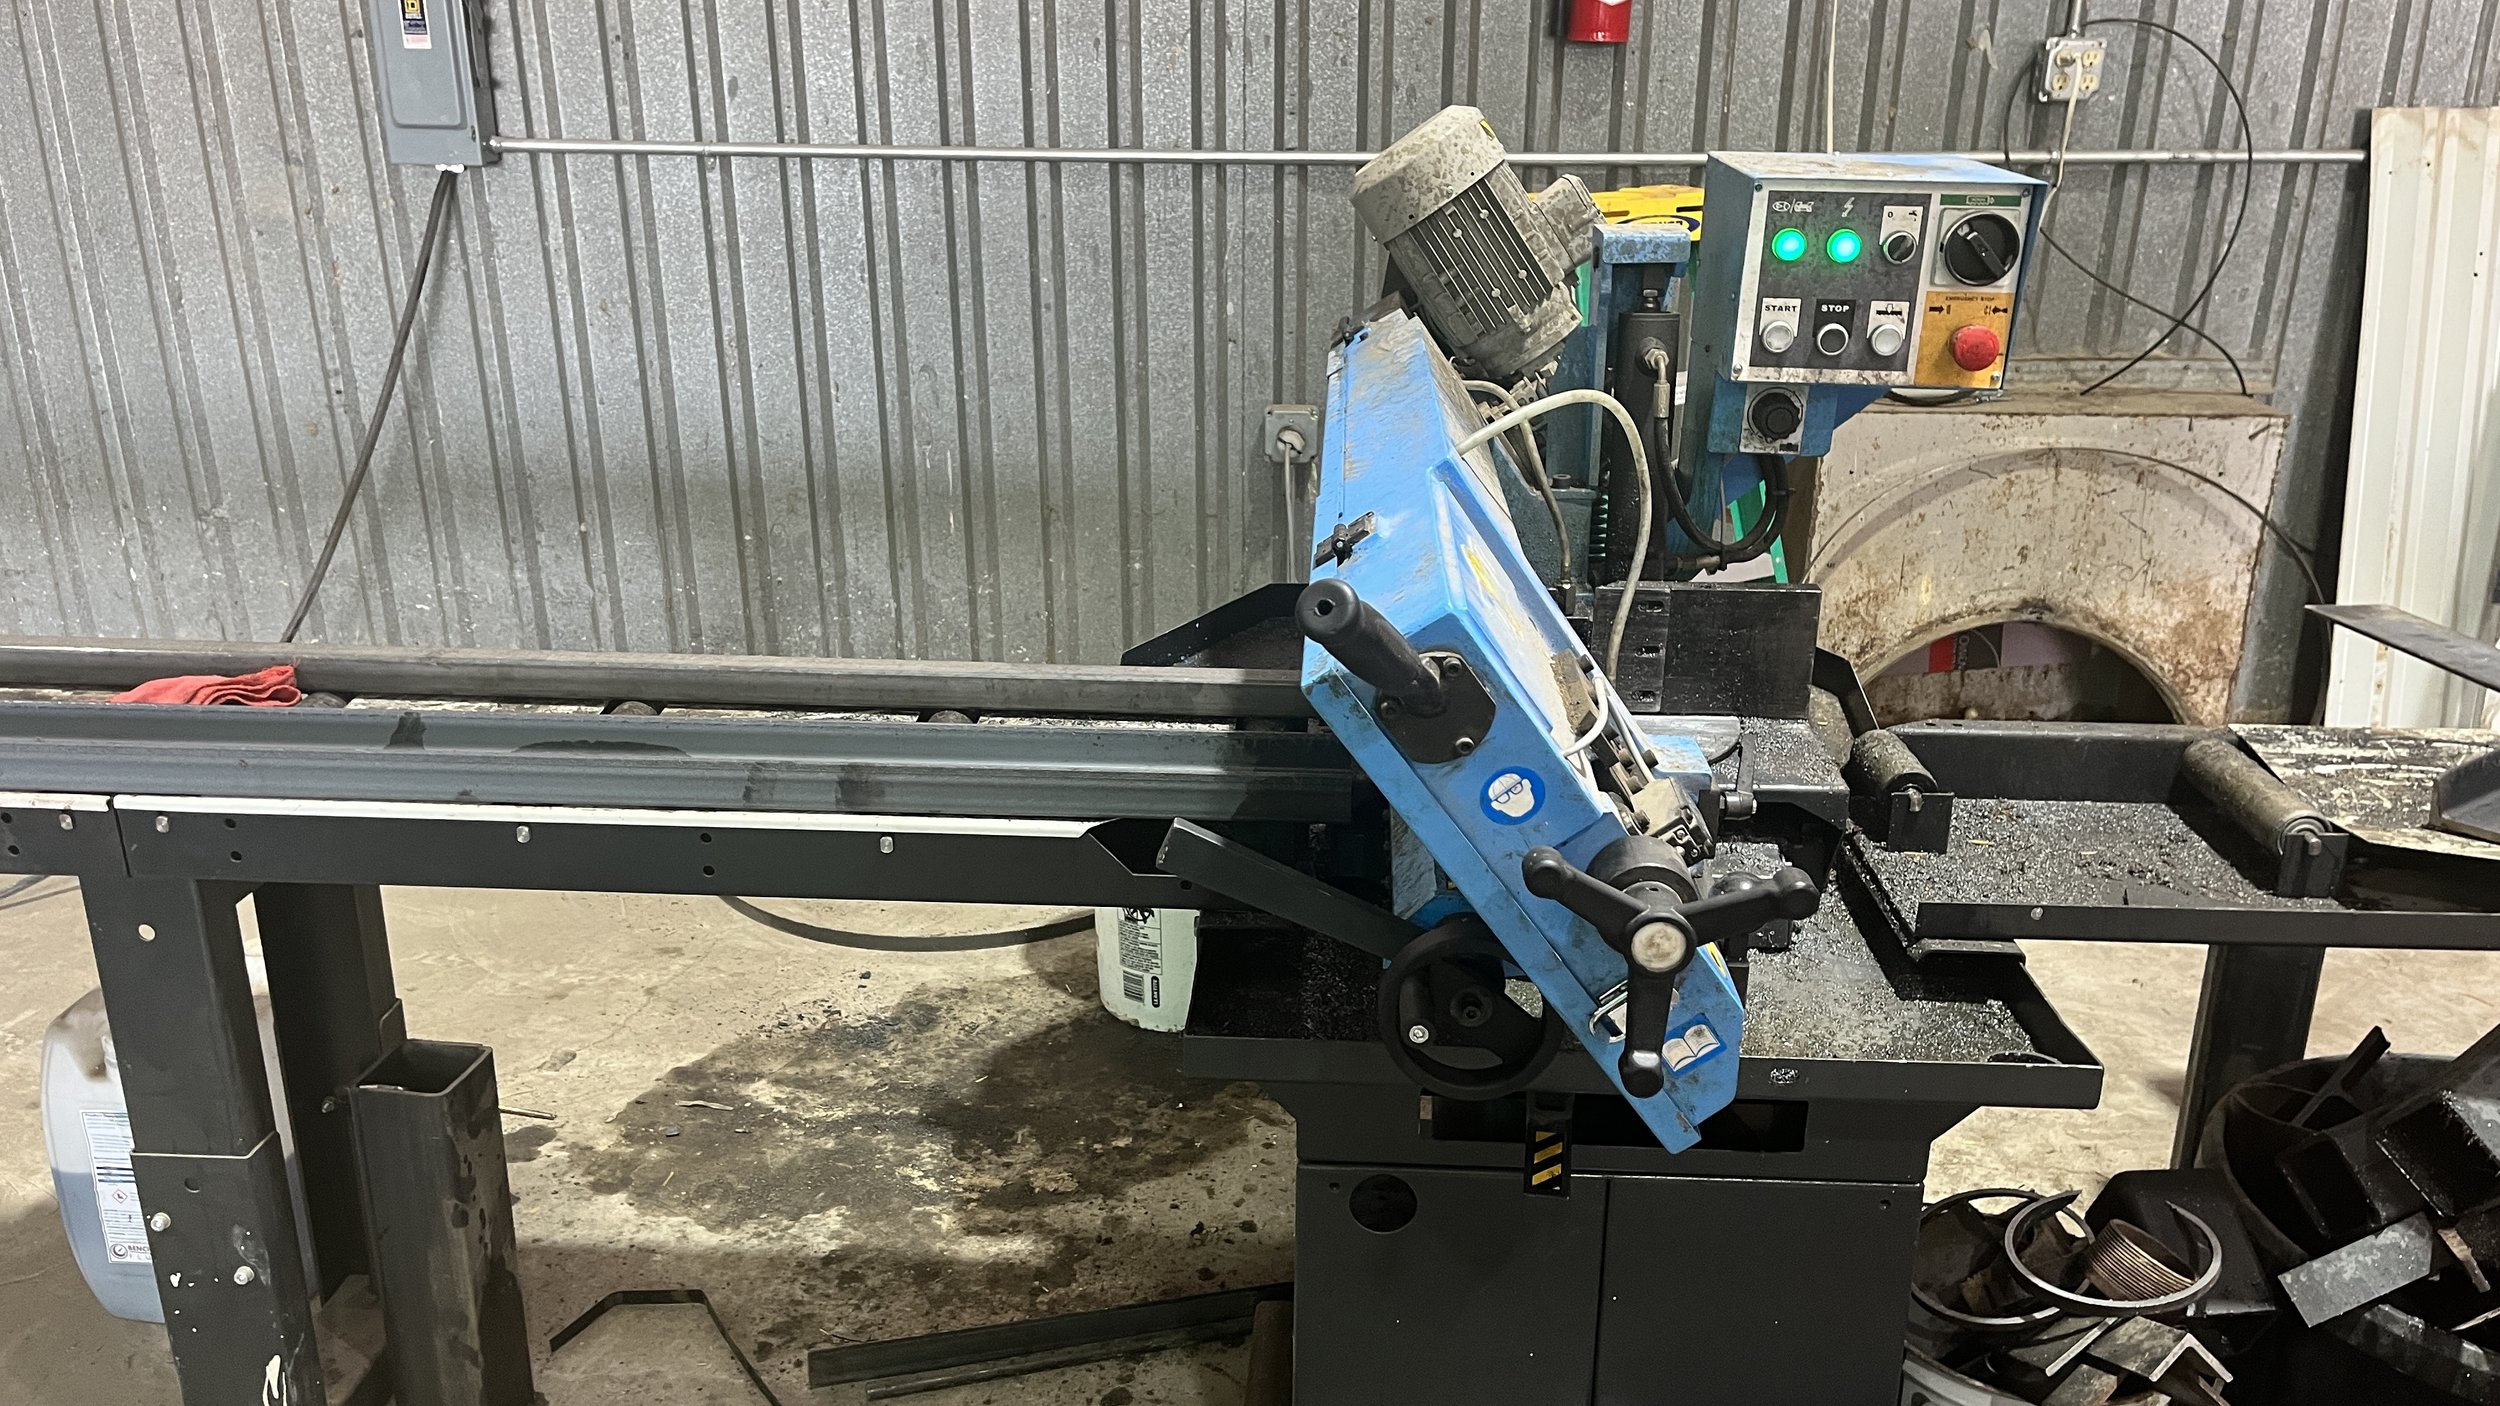
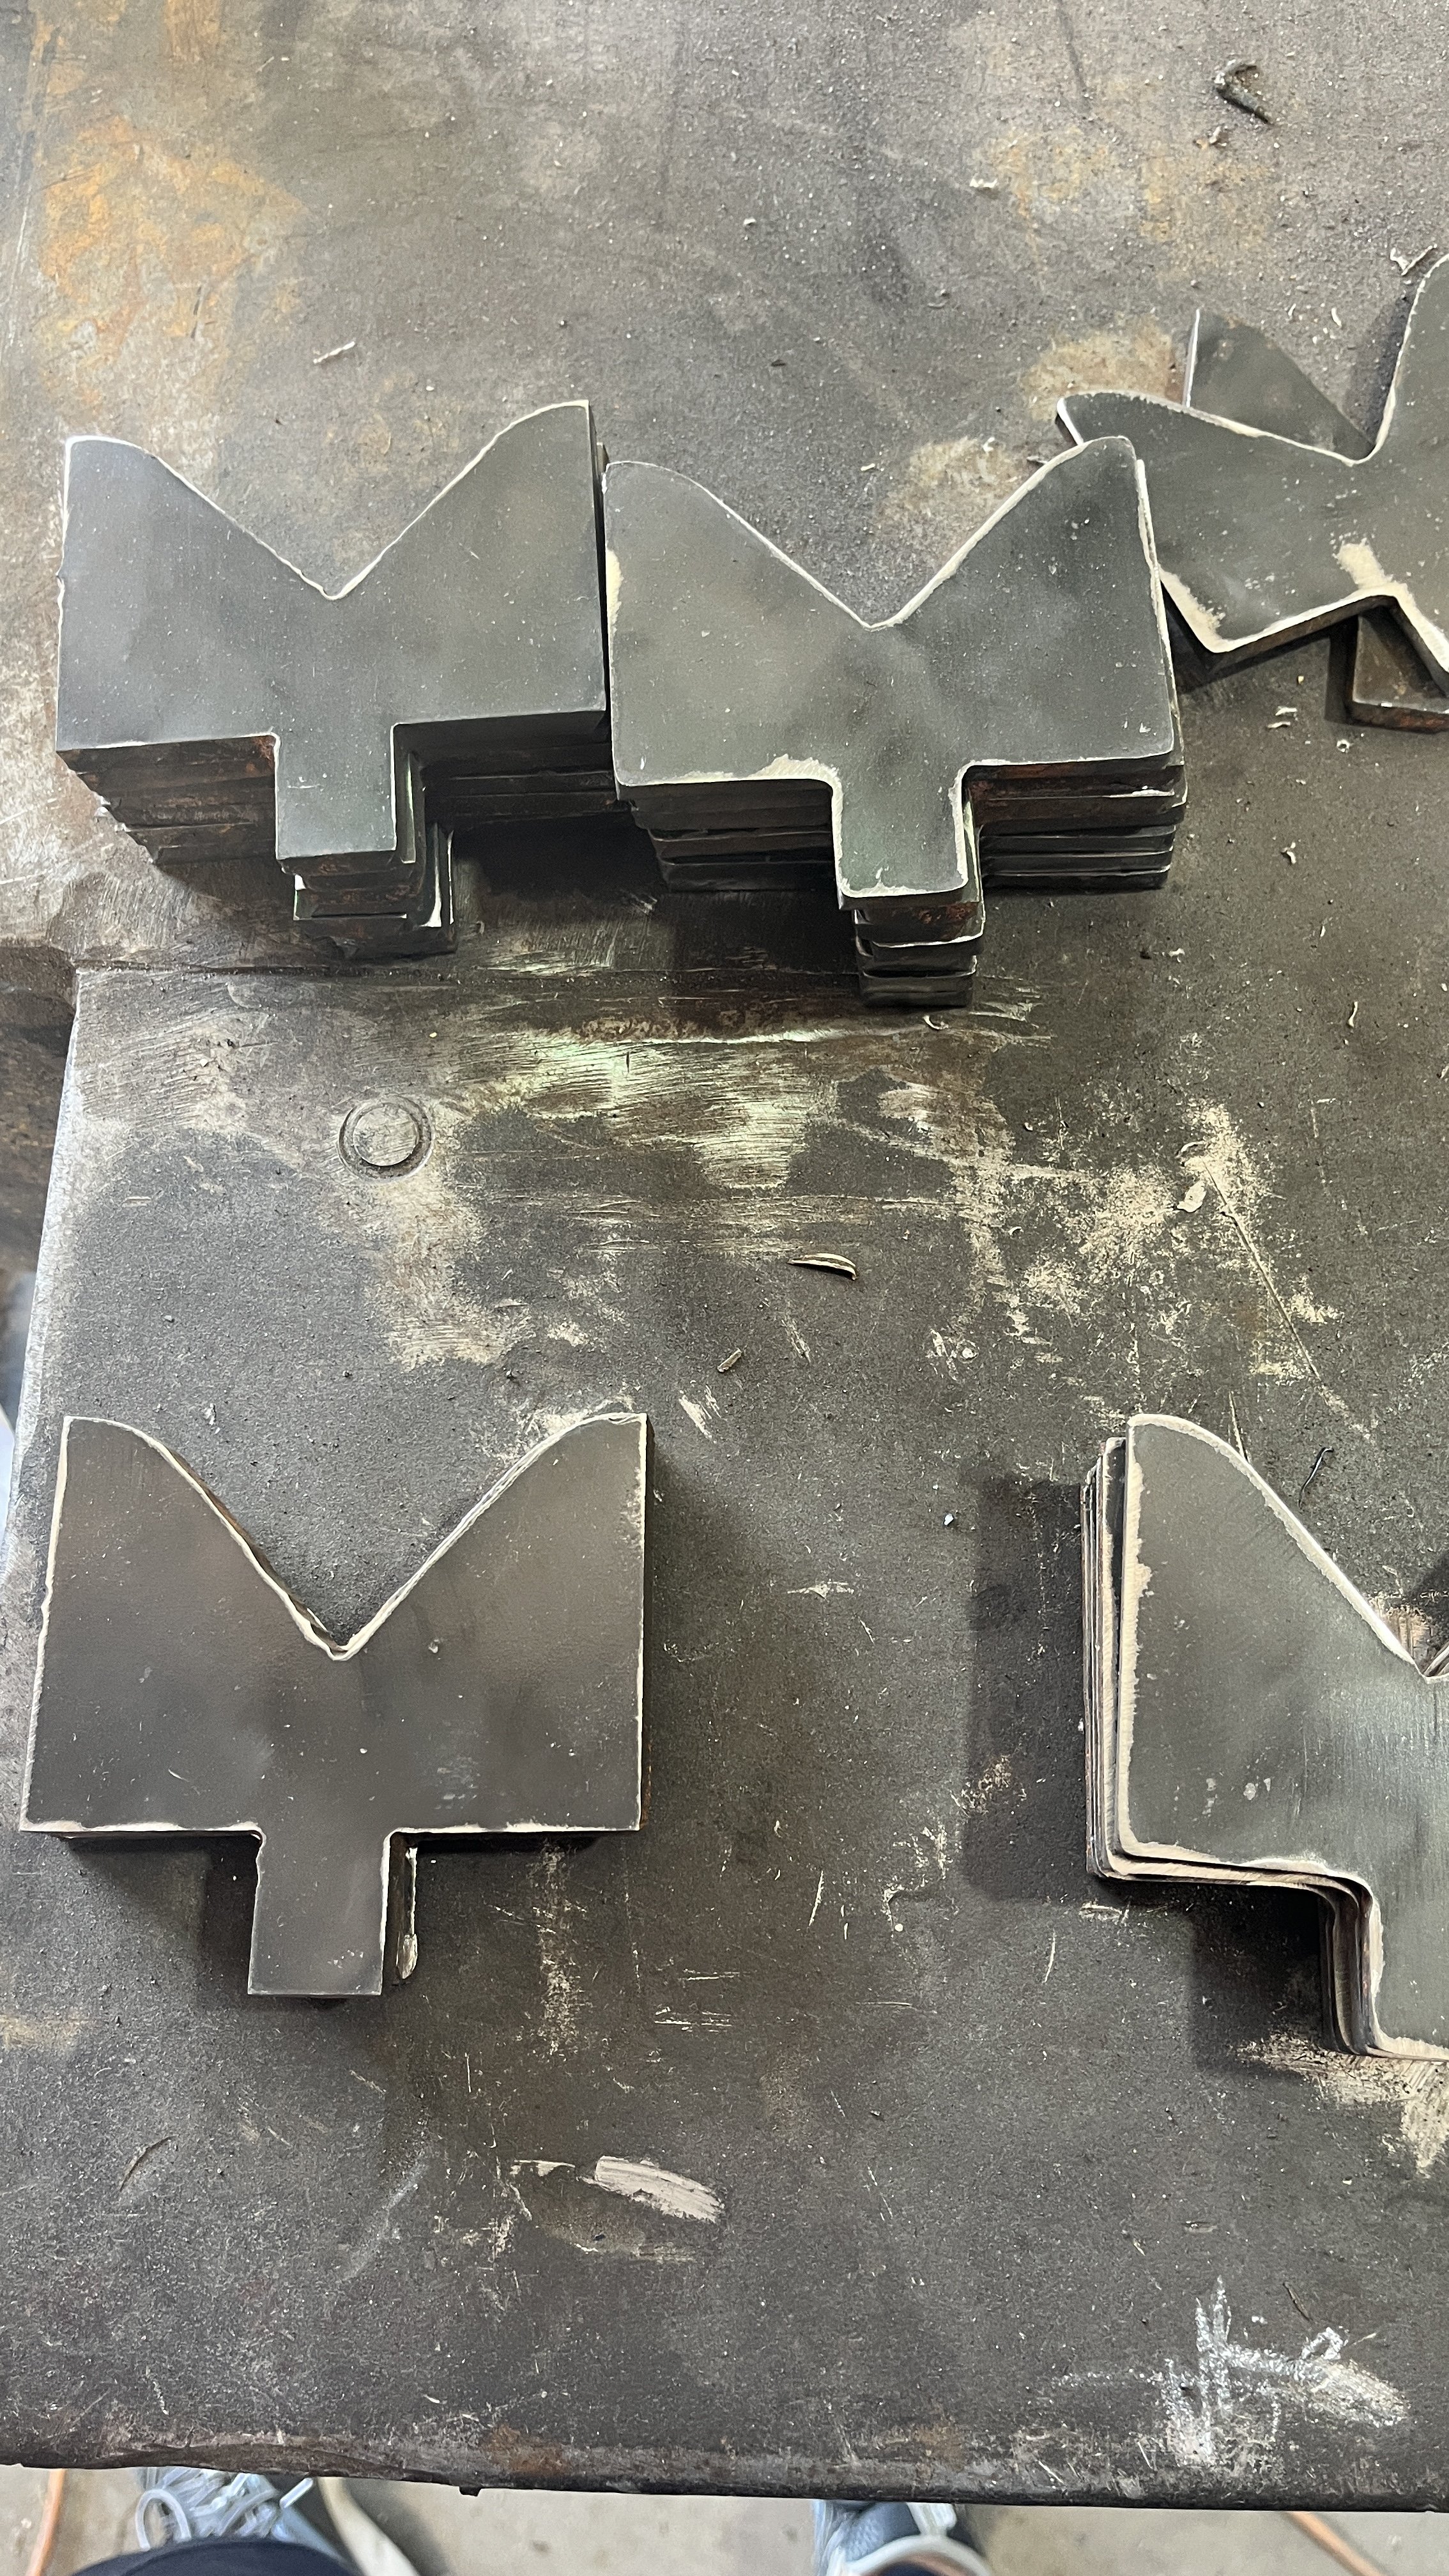
We are currently finishing up Phase 2. We have begun to work on the shear wall components. Shear walls are composed of braced panels that are used to counter the effects of lateral loads on a structure. The most common loads braced wall lines counteract are wind and seismic loads. Our team is using our bandsaw to cut 4 x 7.25-pound channels. The team used the CNC plasma cutting machine to cut 10-gauge material to the appropriate size. The welders assembled the components. Things are moving along quickly, and we are on our way to completing Phase 3.
Steel Fabrication
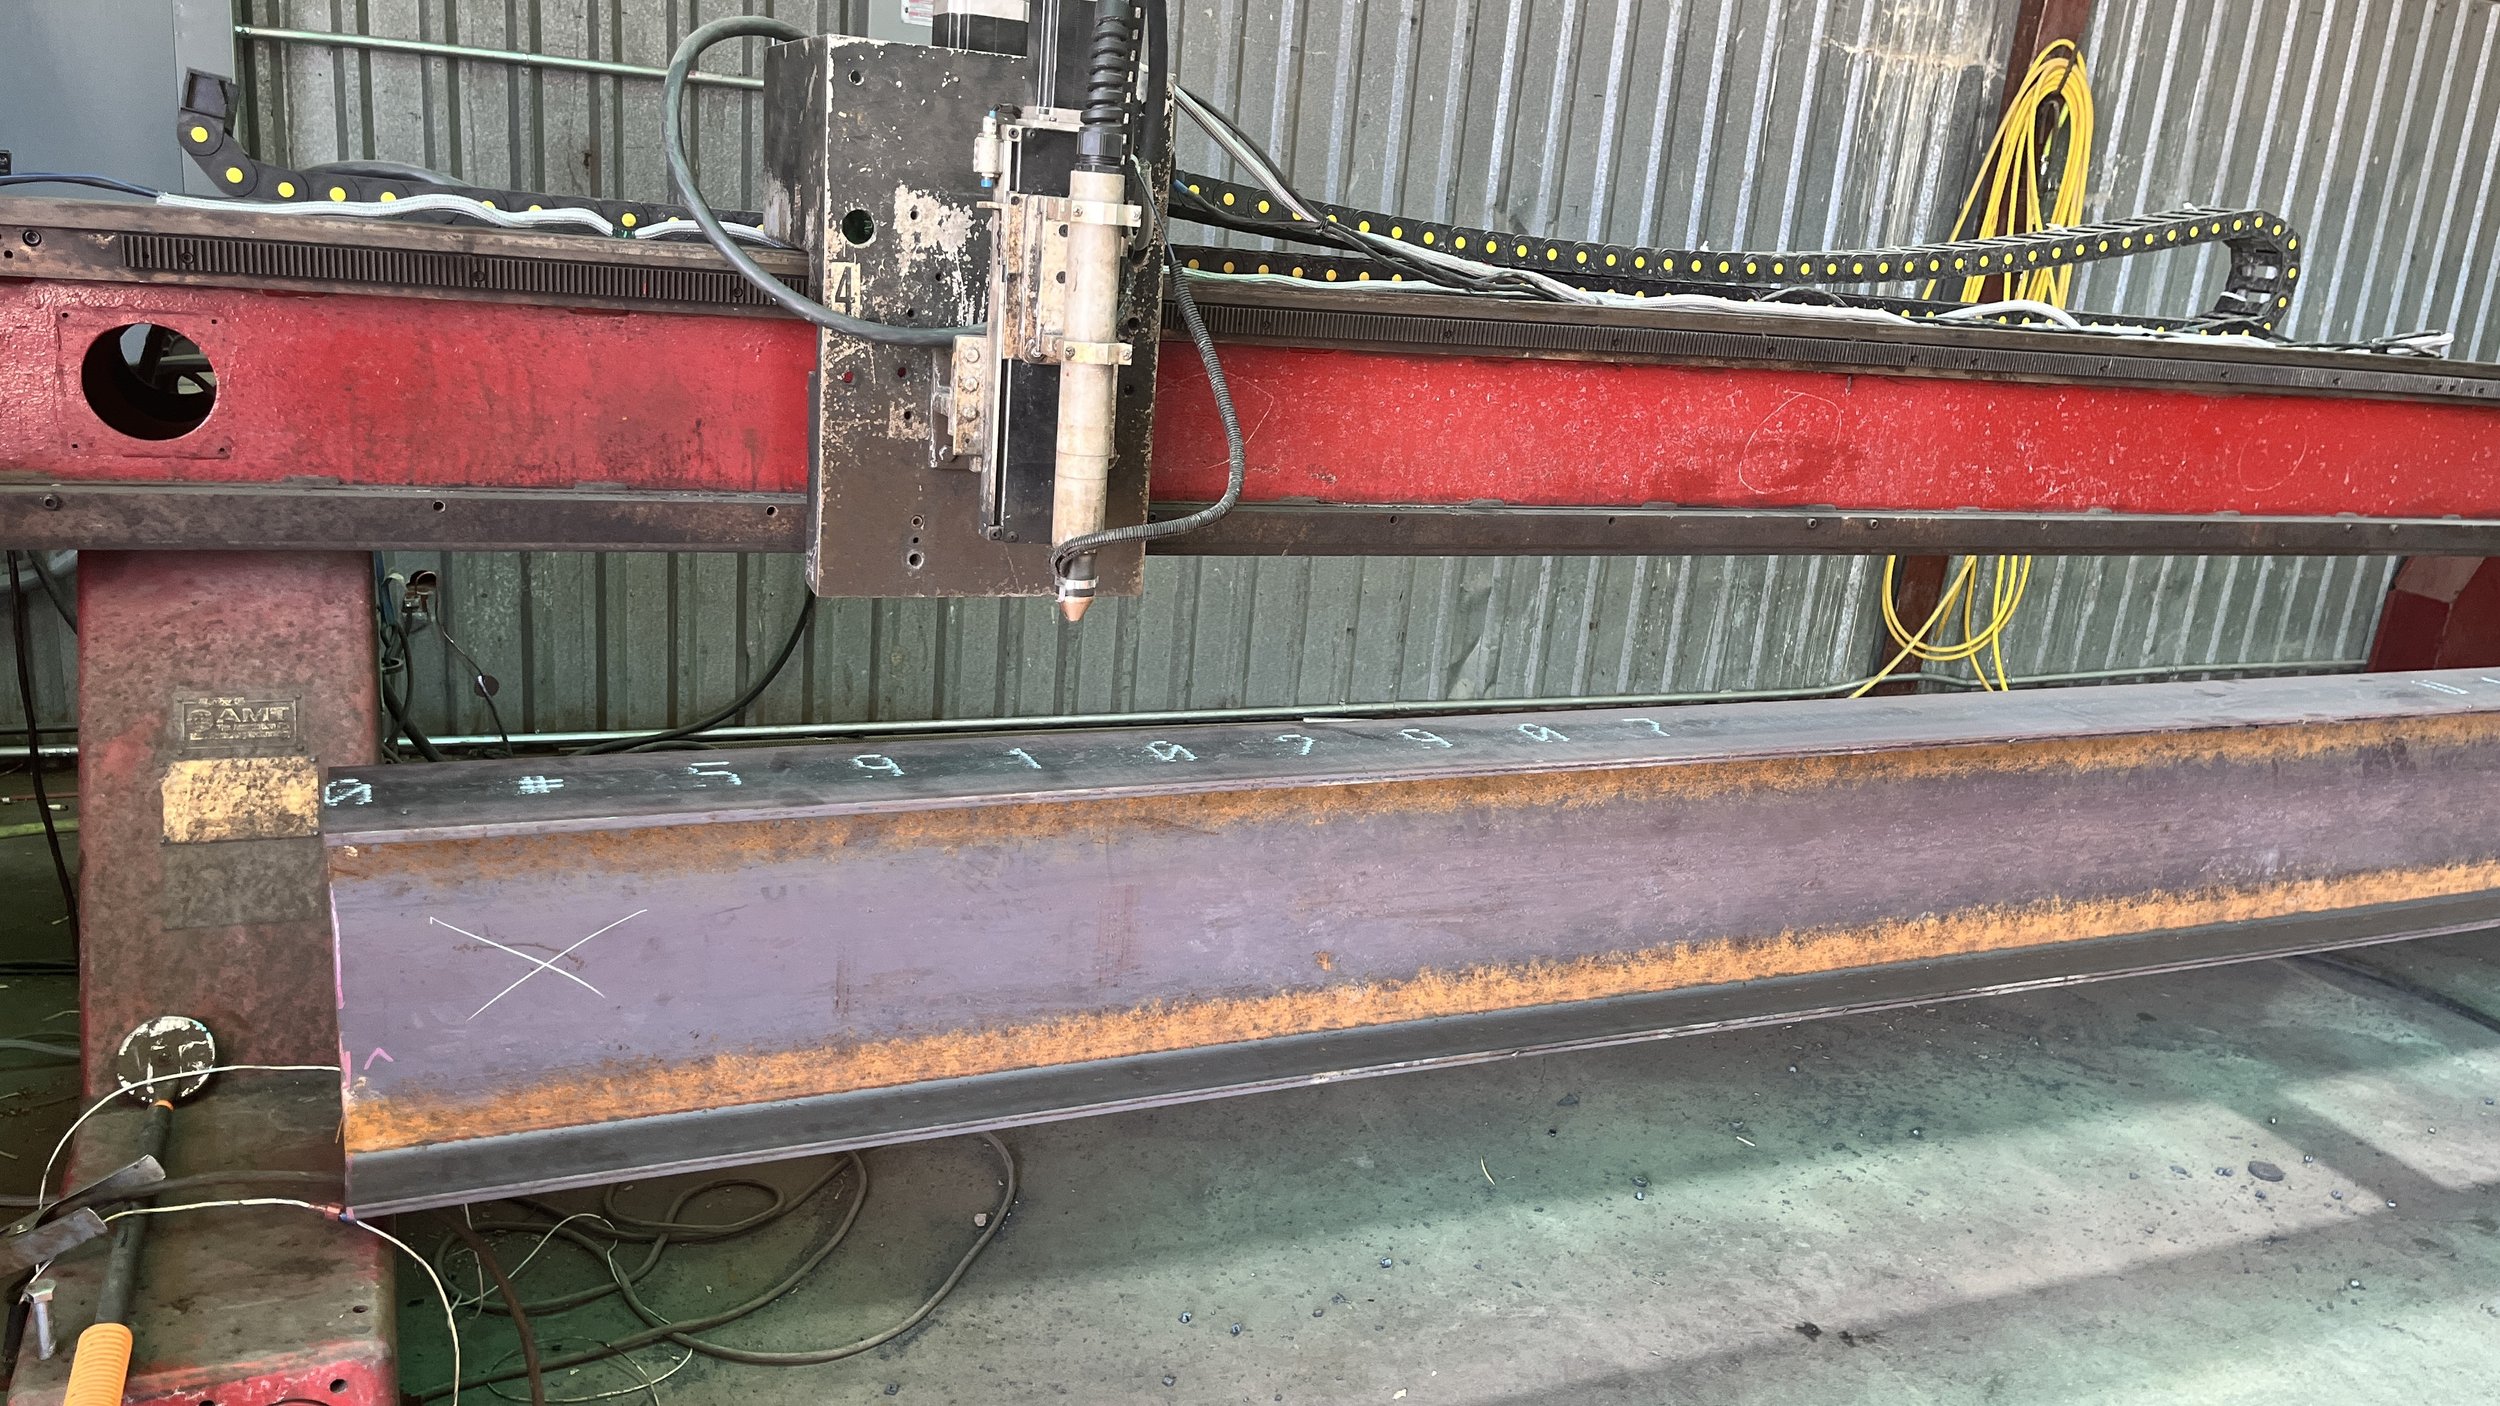
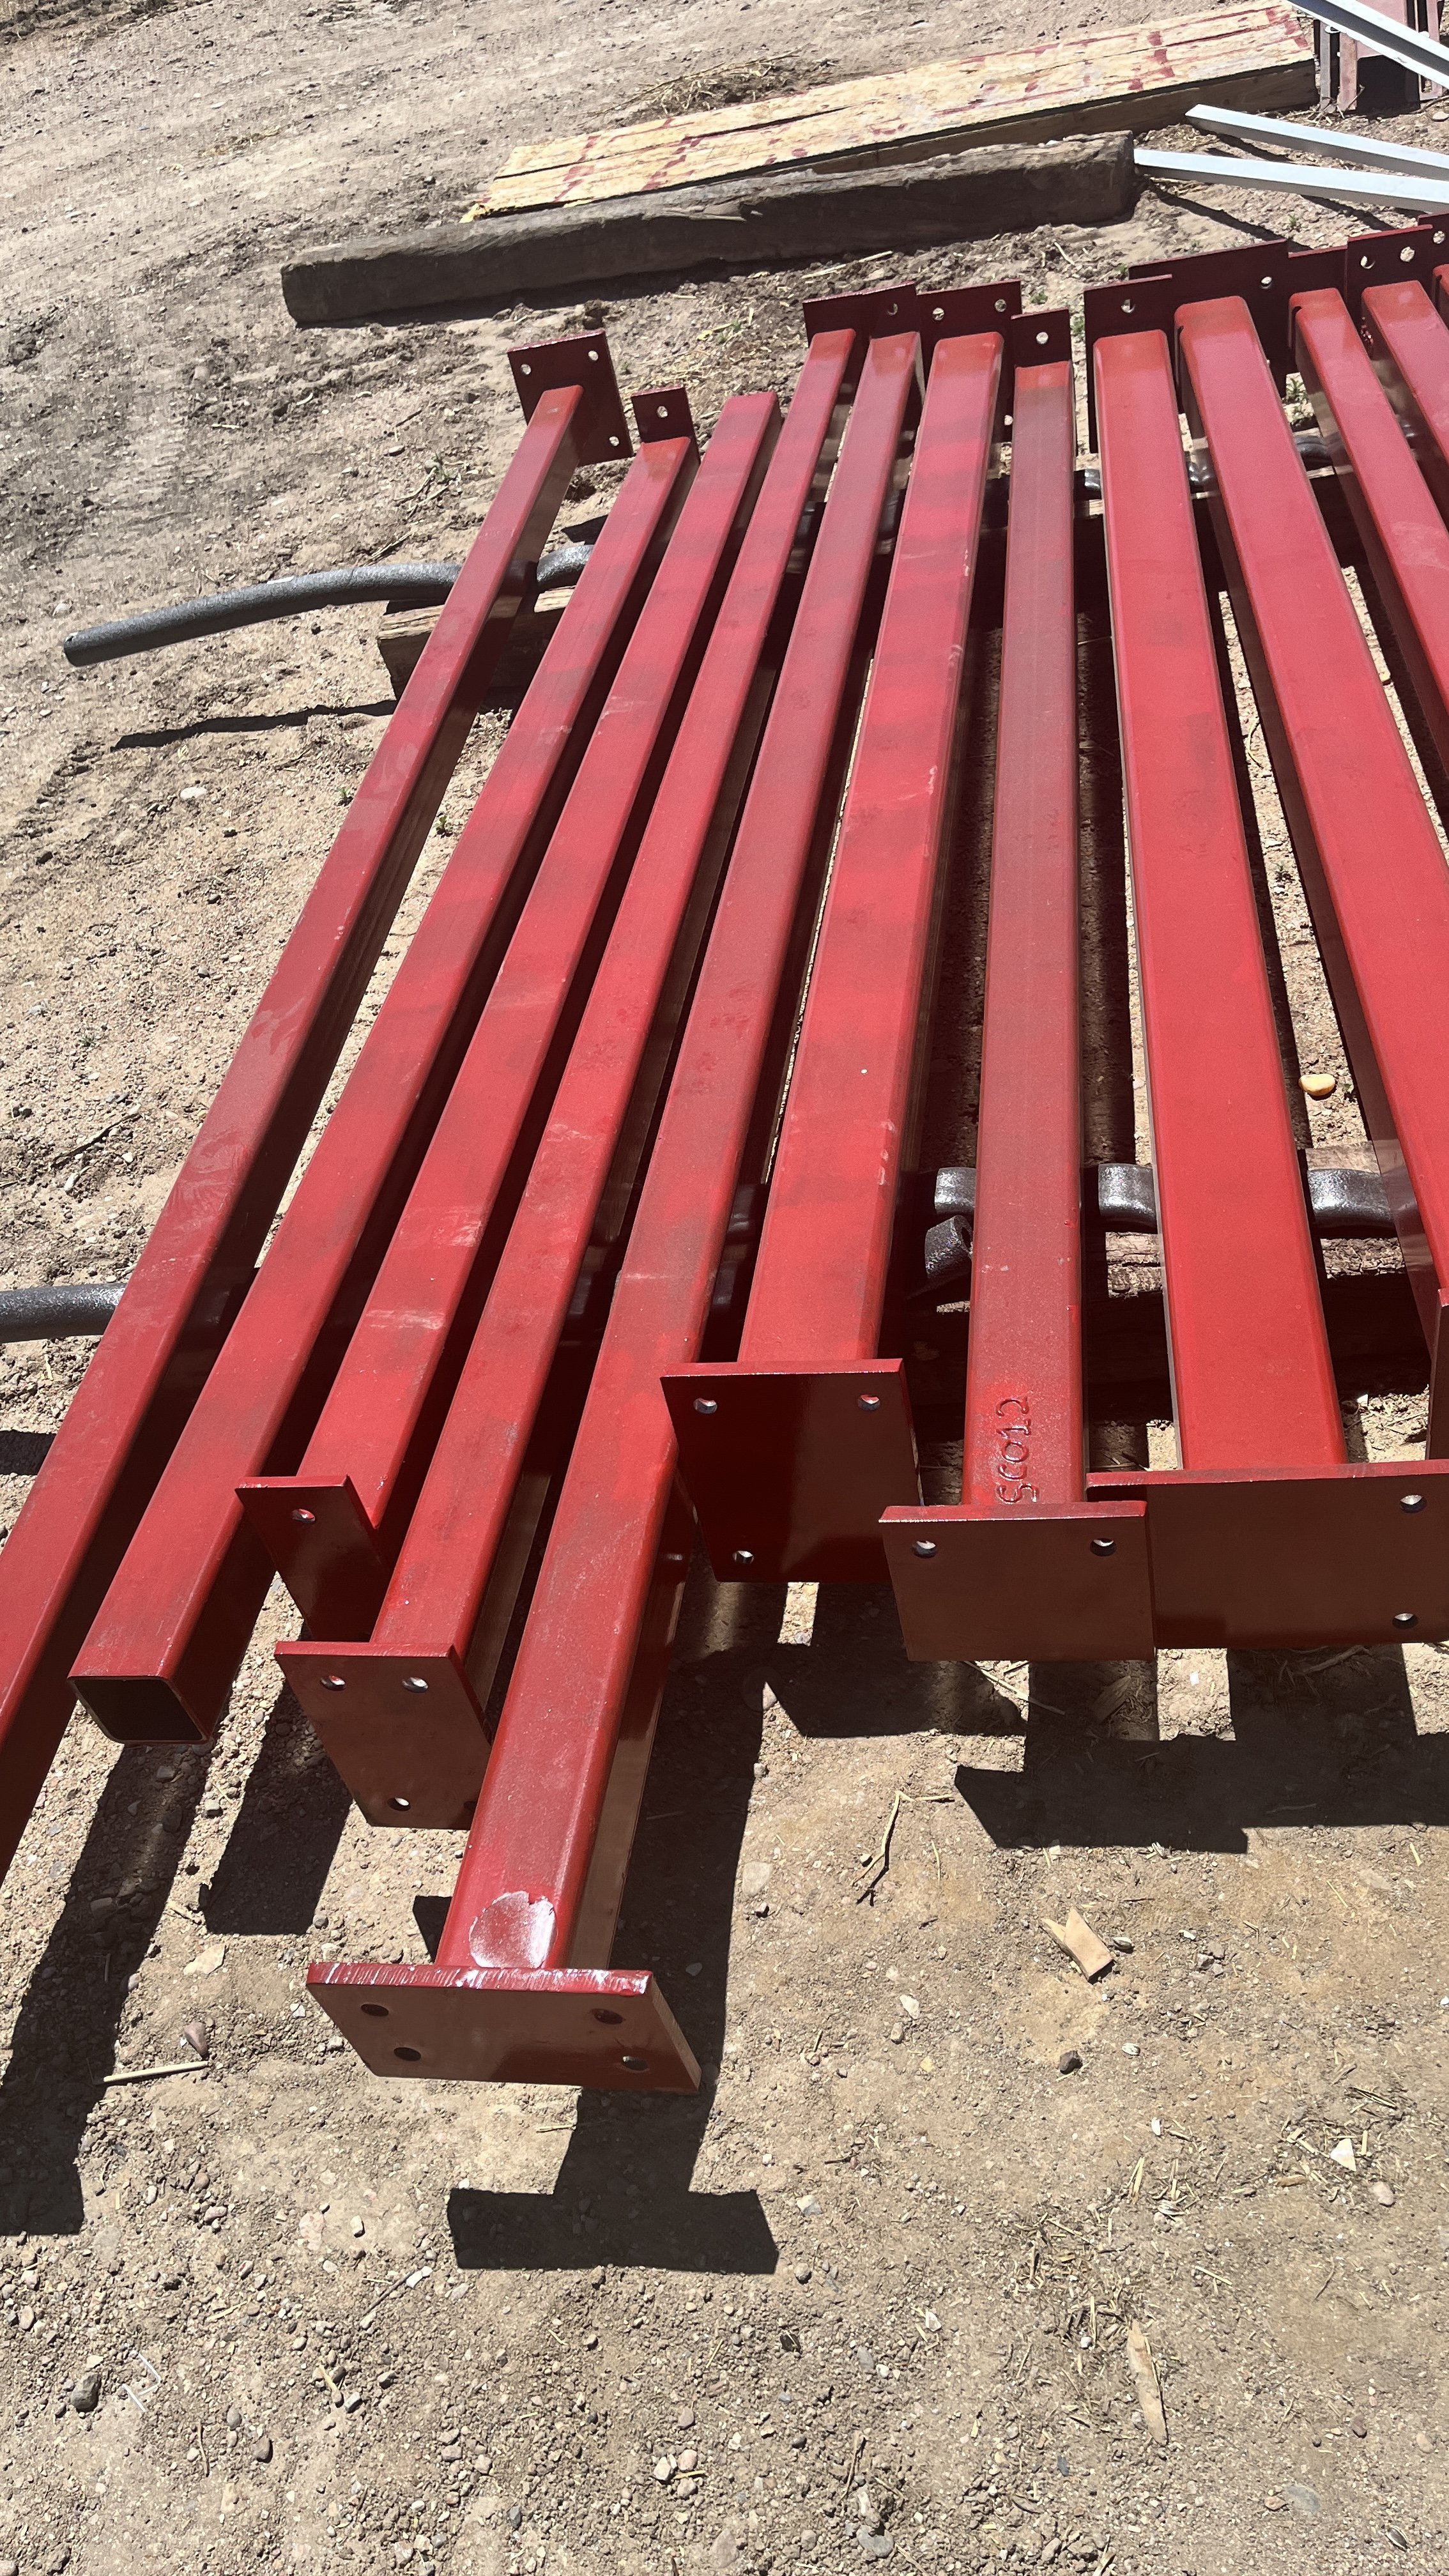
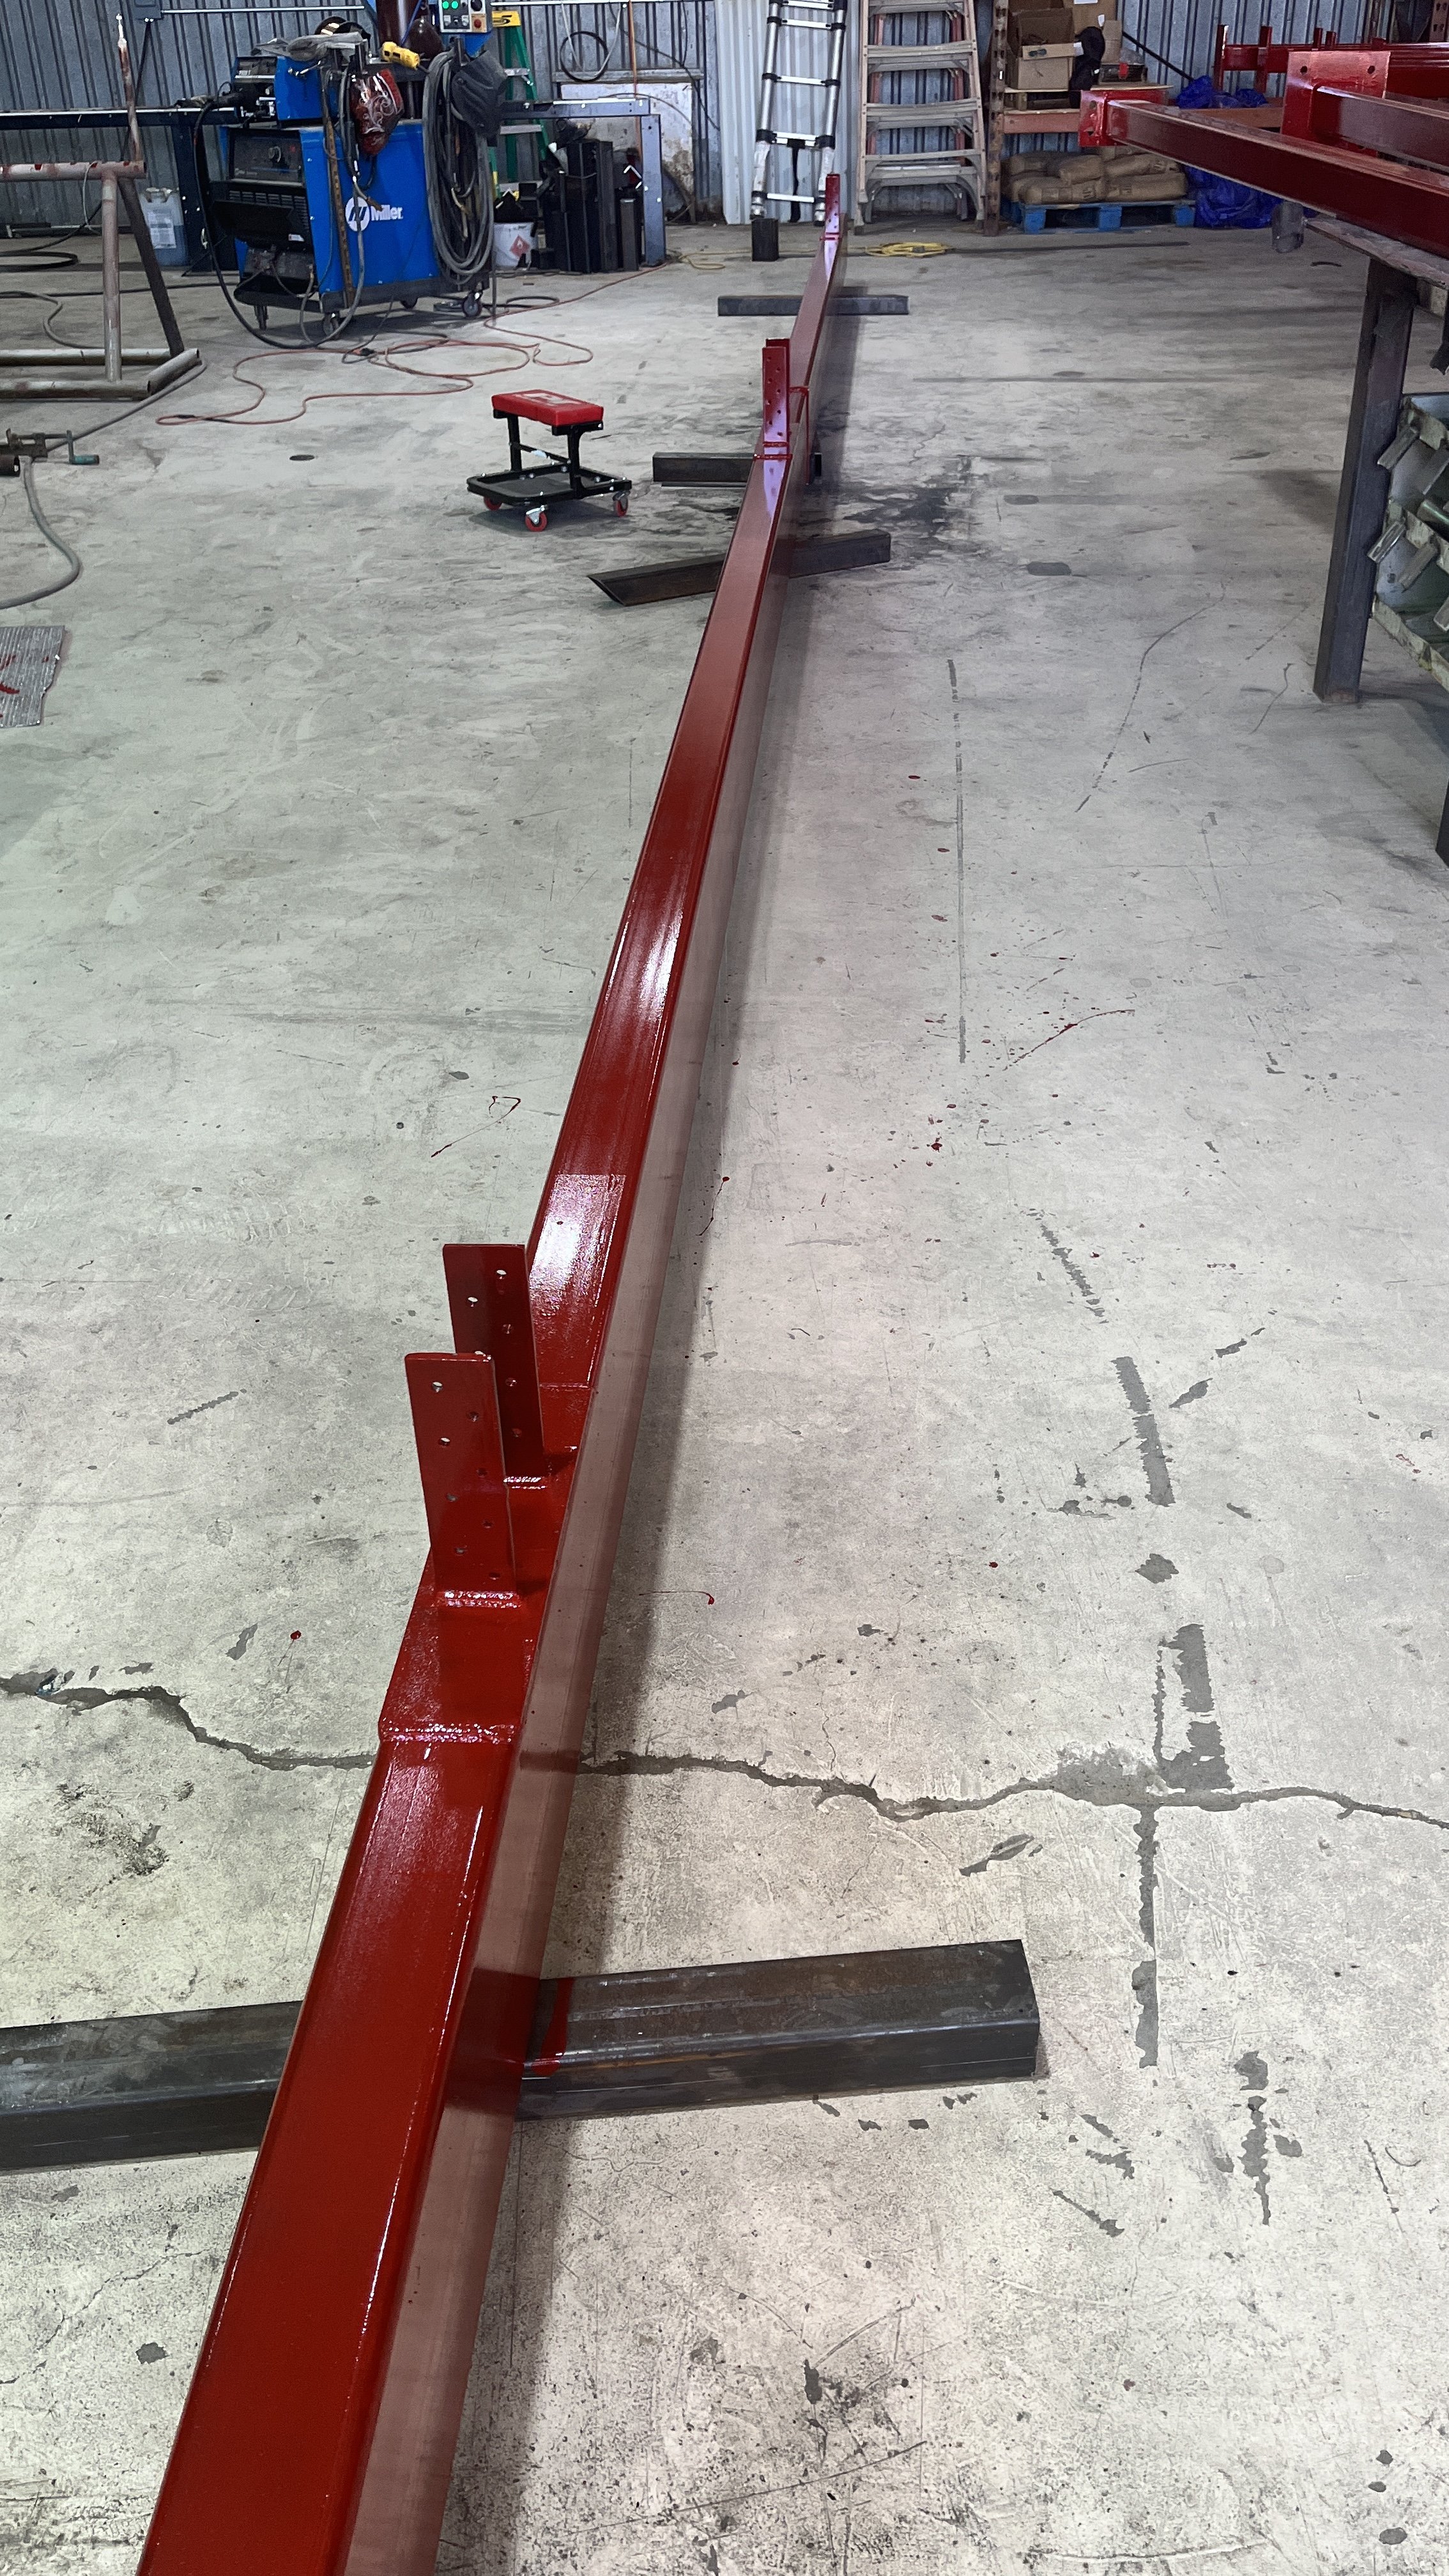
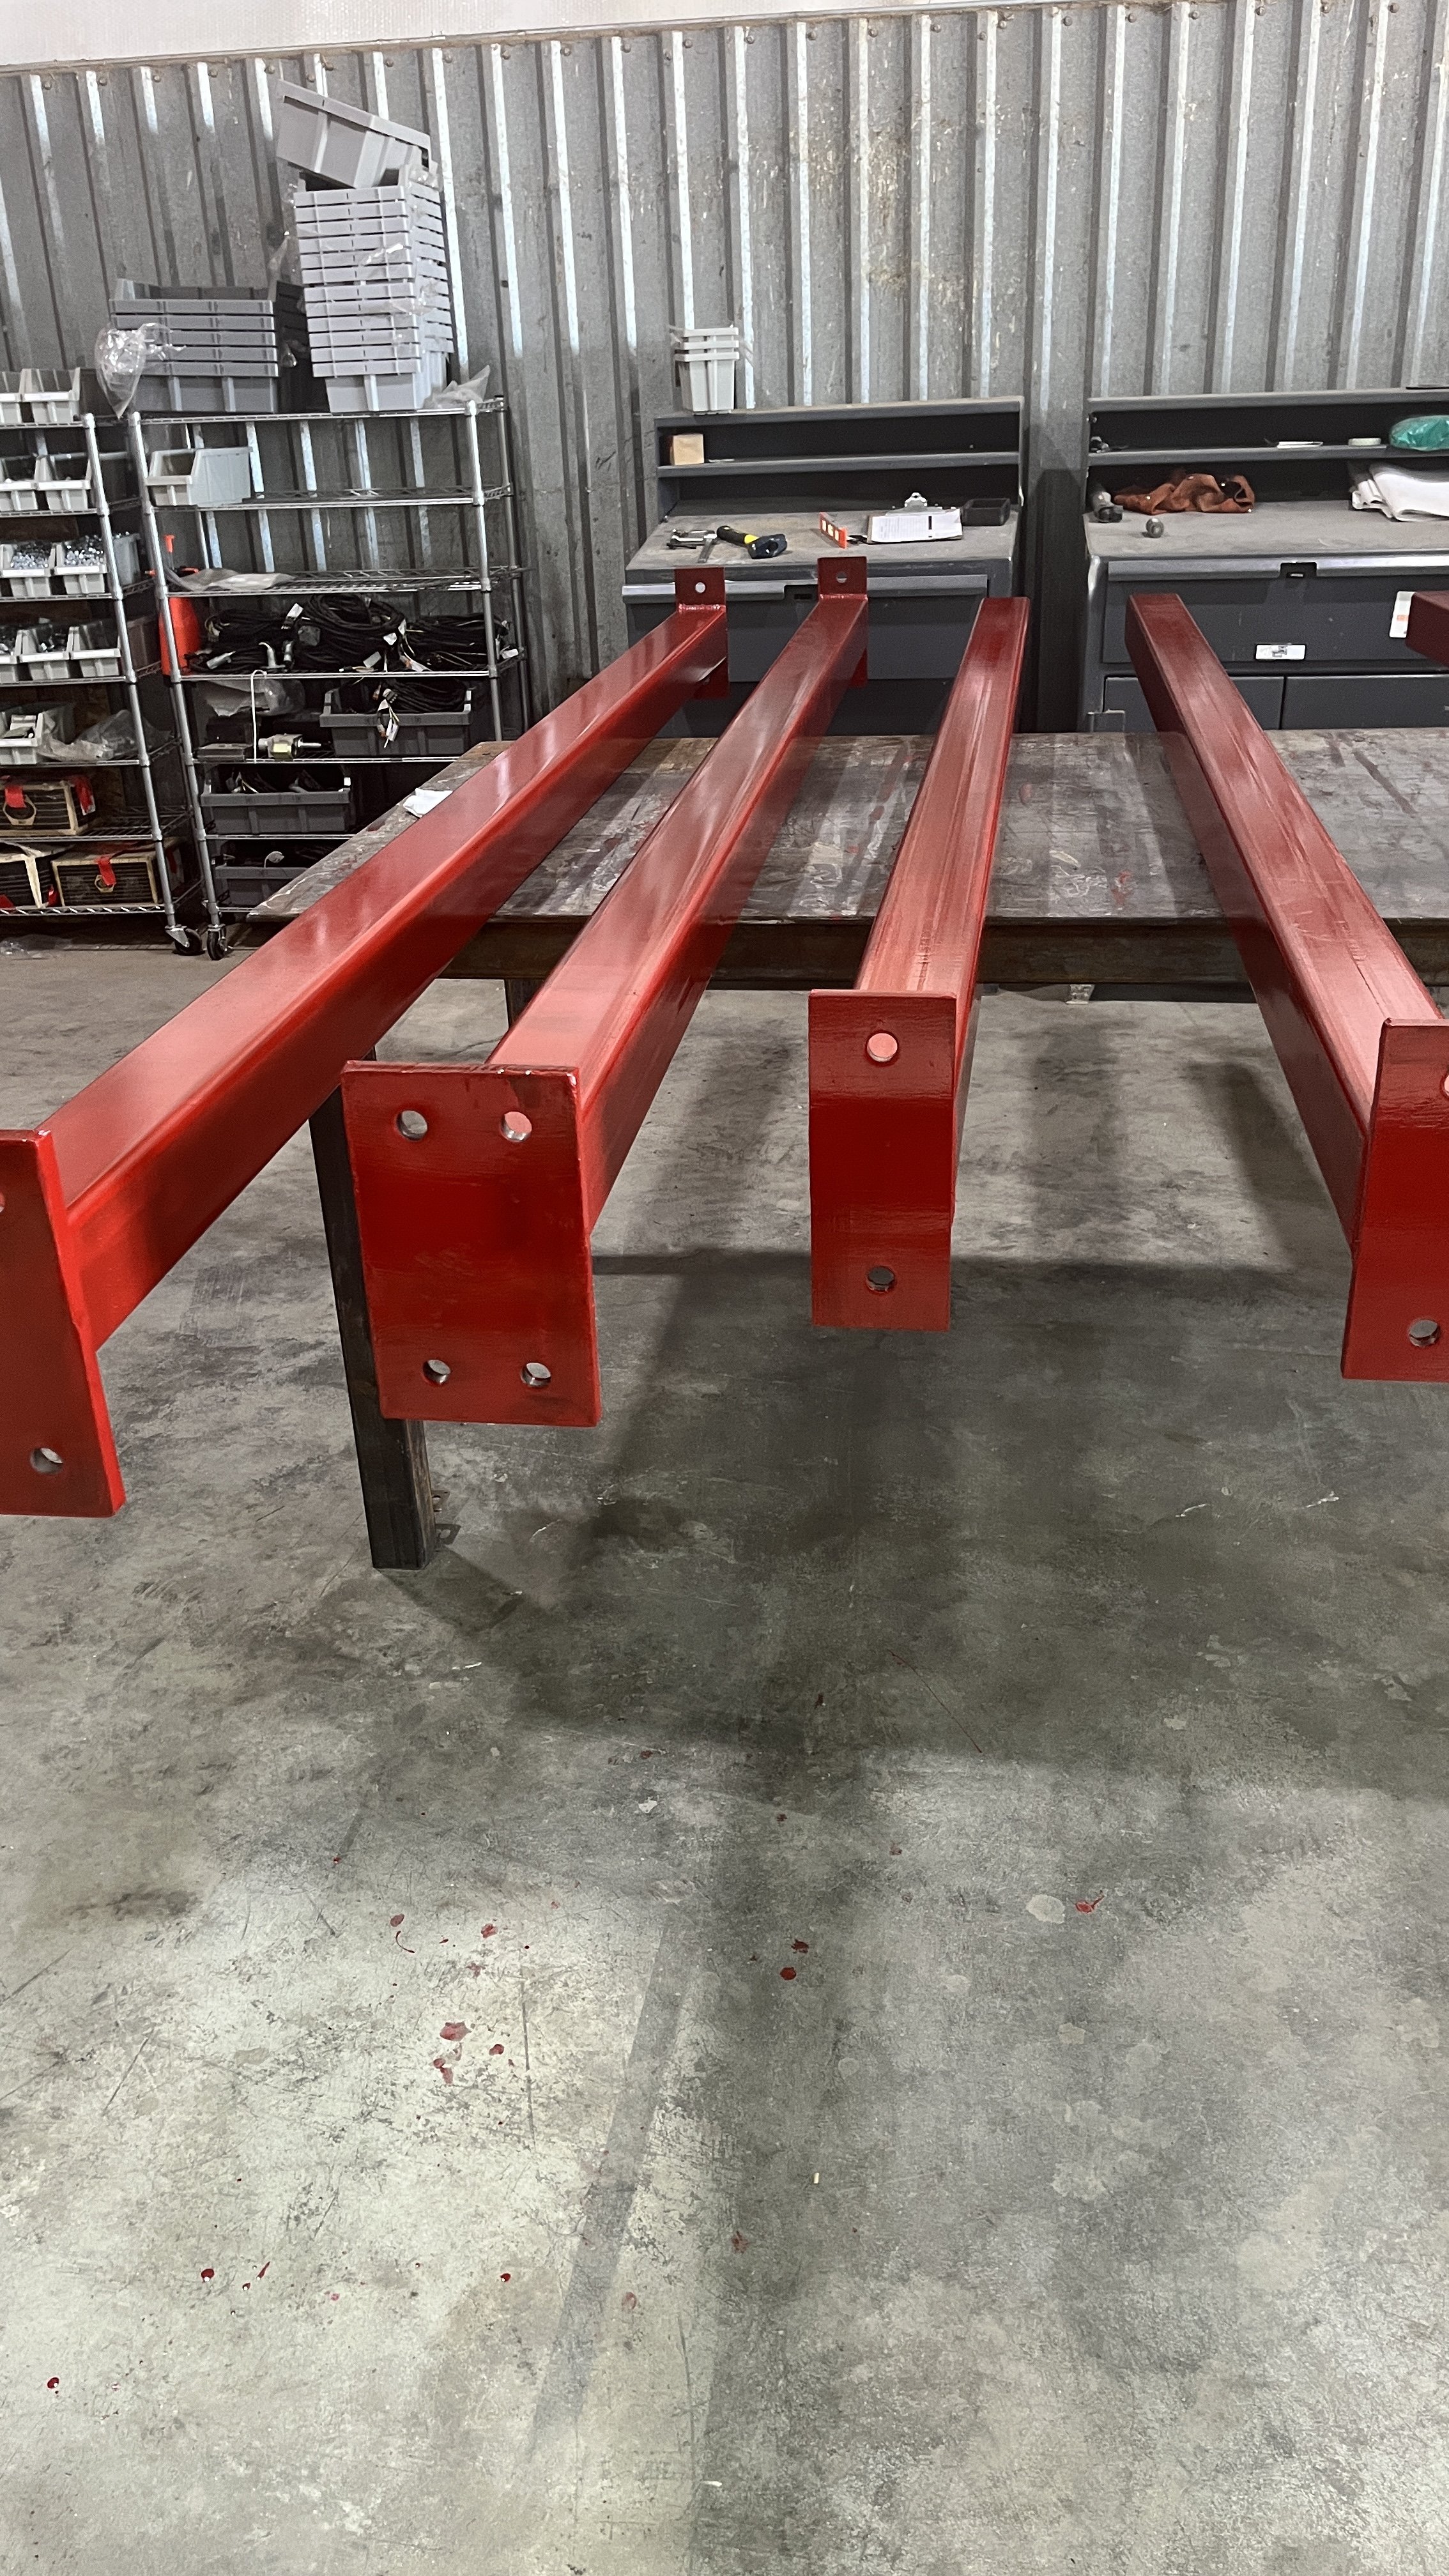
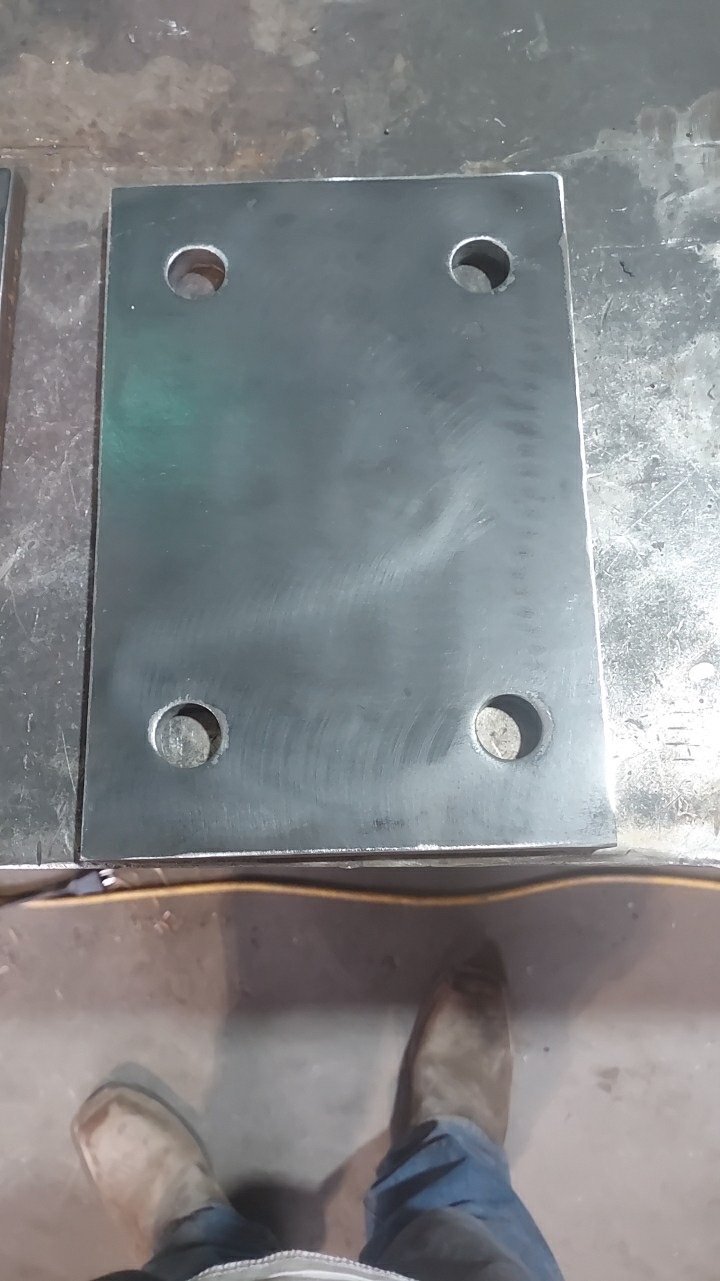
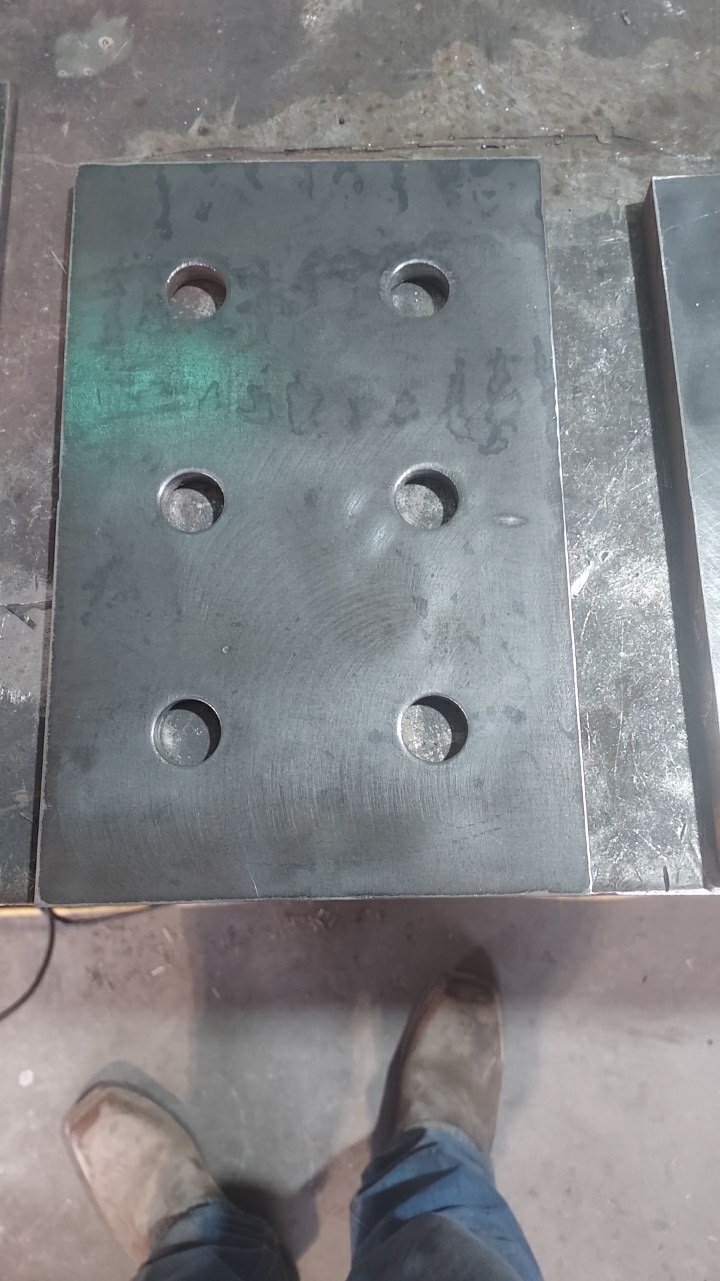
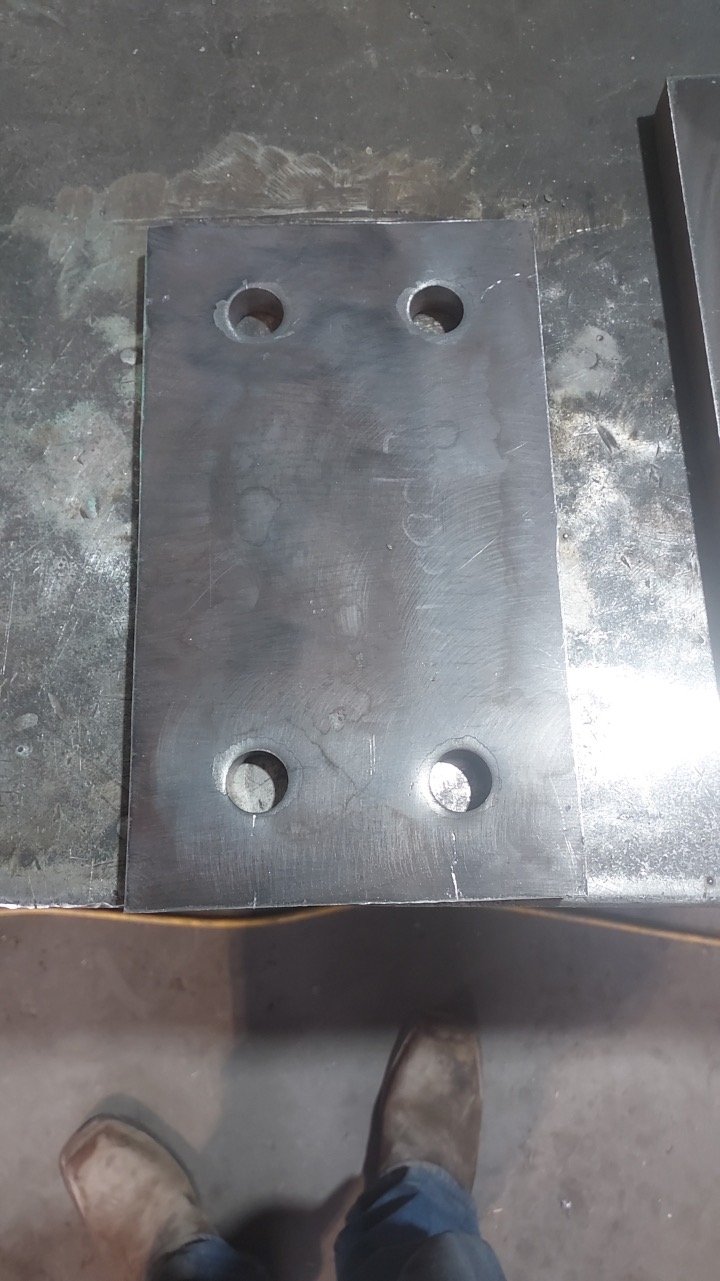
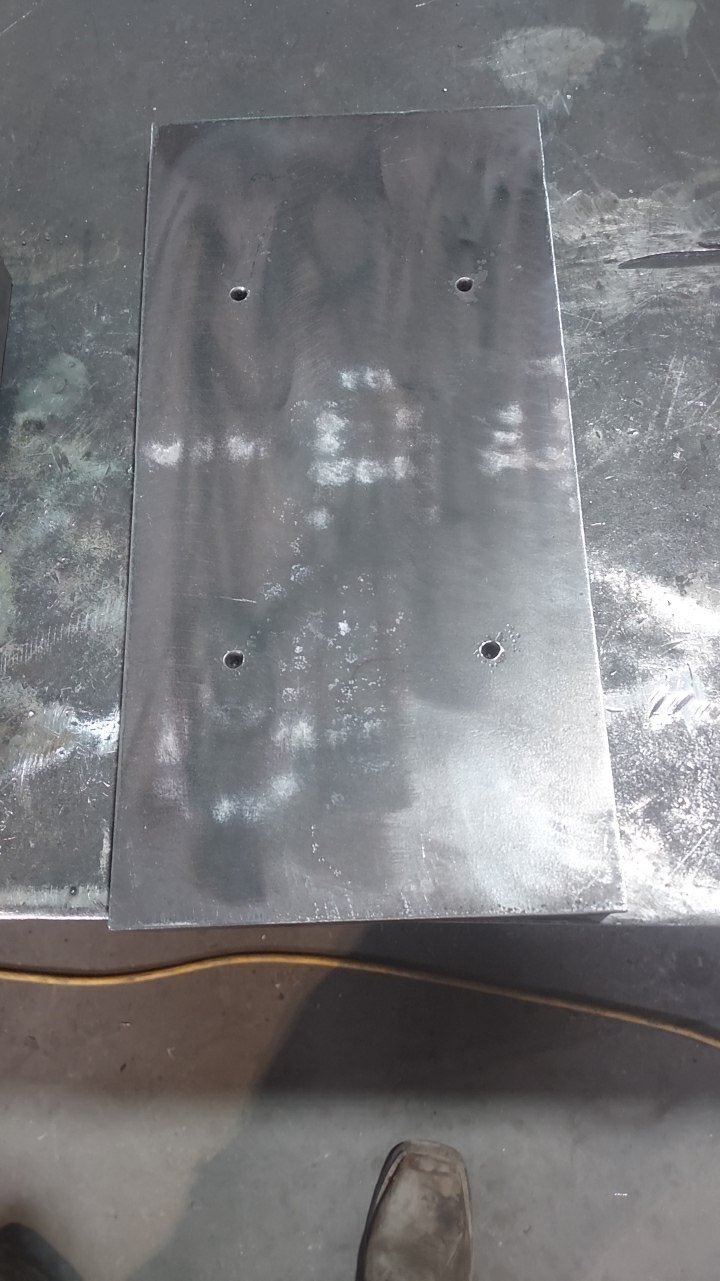
In Phase 2 of our project, we are finishing the beams and posts. We have utilized our CNC plasma cutting machine to precisely cut the holes on each beam. The holes had to be cut in the beams for assembly. Our welders had to weld plates that were cut but our CNC plasma cutting machine. A welding process was used to join the plates to the beams at the points where they are connected.
Once all the beams and plates have been completed, we painted them for them to be ready for the job site.

Steel Fabrication
In our fabrication shop, we are currently working on one of our larger projects. Our client is remodeling an existing house. Instead of wood, the structural foundation will be made of steel beams and tubes. For this project, we have divided the project into 3 phases. We are currently in phase 1. In this phase, we will utilize our CNC plasma cutting machine to cut our steel sheets and steel beams, our Ironworker to punch holes, our bandsaw to cut steel beams and steel tubing, and our welders to put everything together.
To begin, the steel beams and tubing were first cut to the right lengths with the bandsaw. This project uses a variety of tubing sizes, including 4"x4", 5"x5", 3"x3/8", 3.5"x3.5"x1/4" and 10"x4"x1/4". The beams range from 8" to 18" wide and weigh 21 to 86 pounds per foot on the project. We are working with beams that range from 2' to 24' in length.
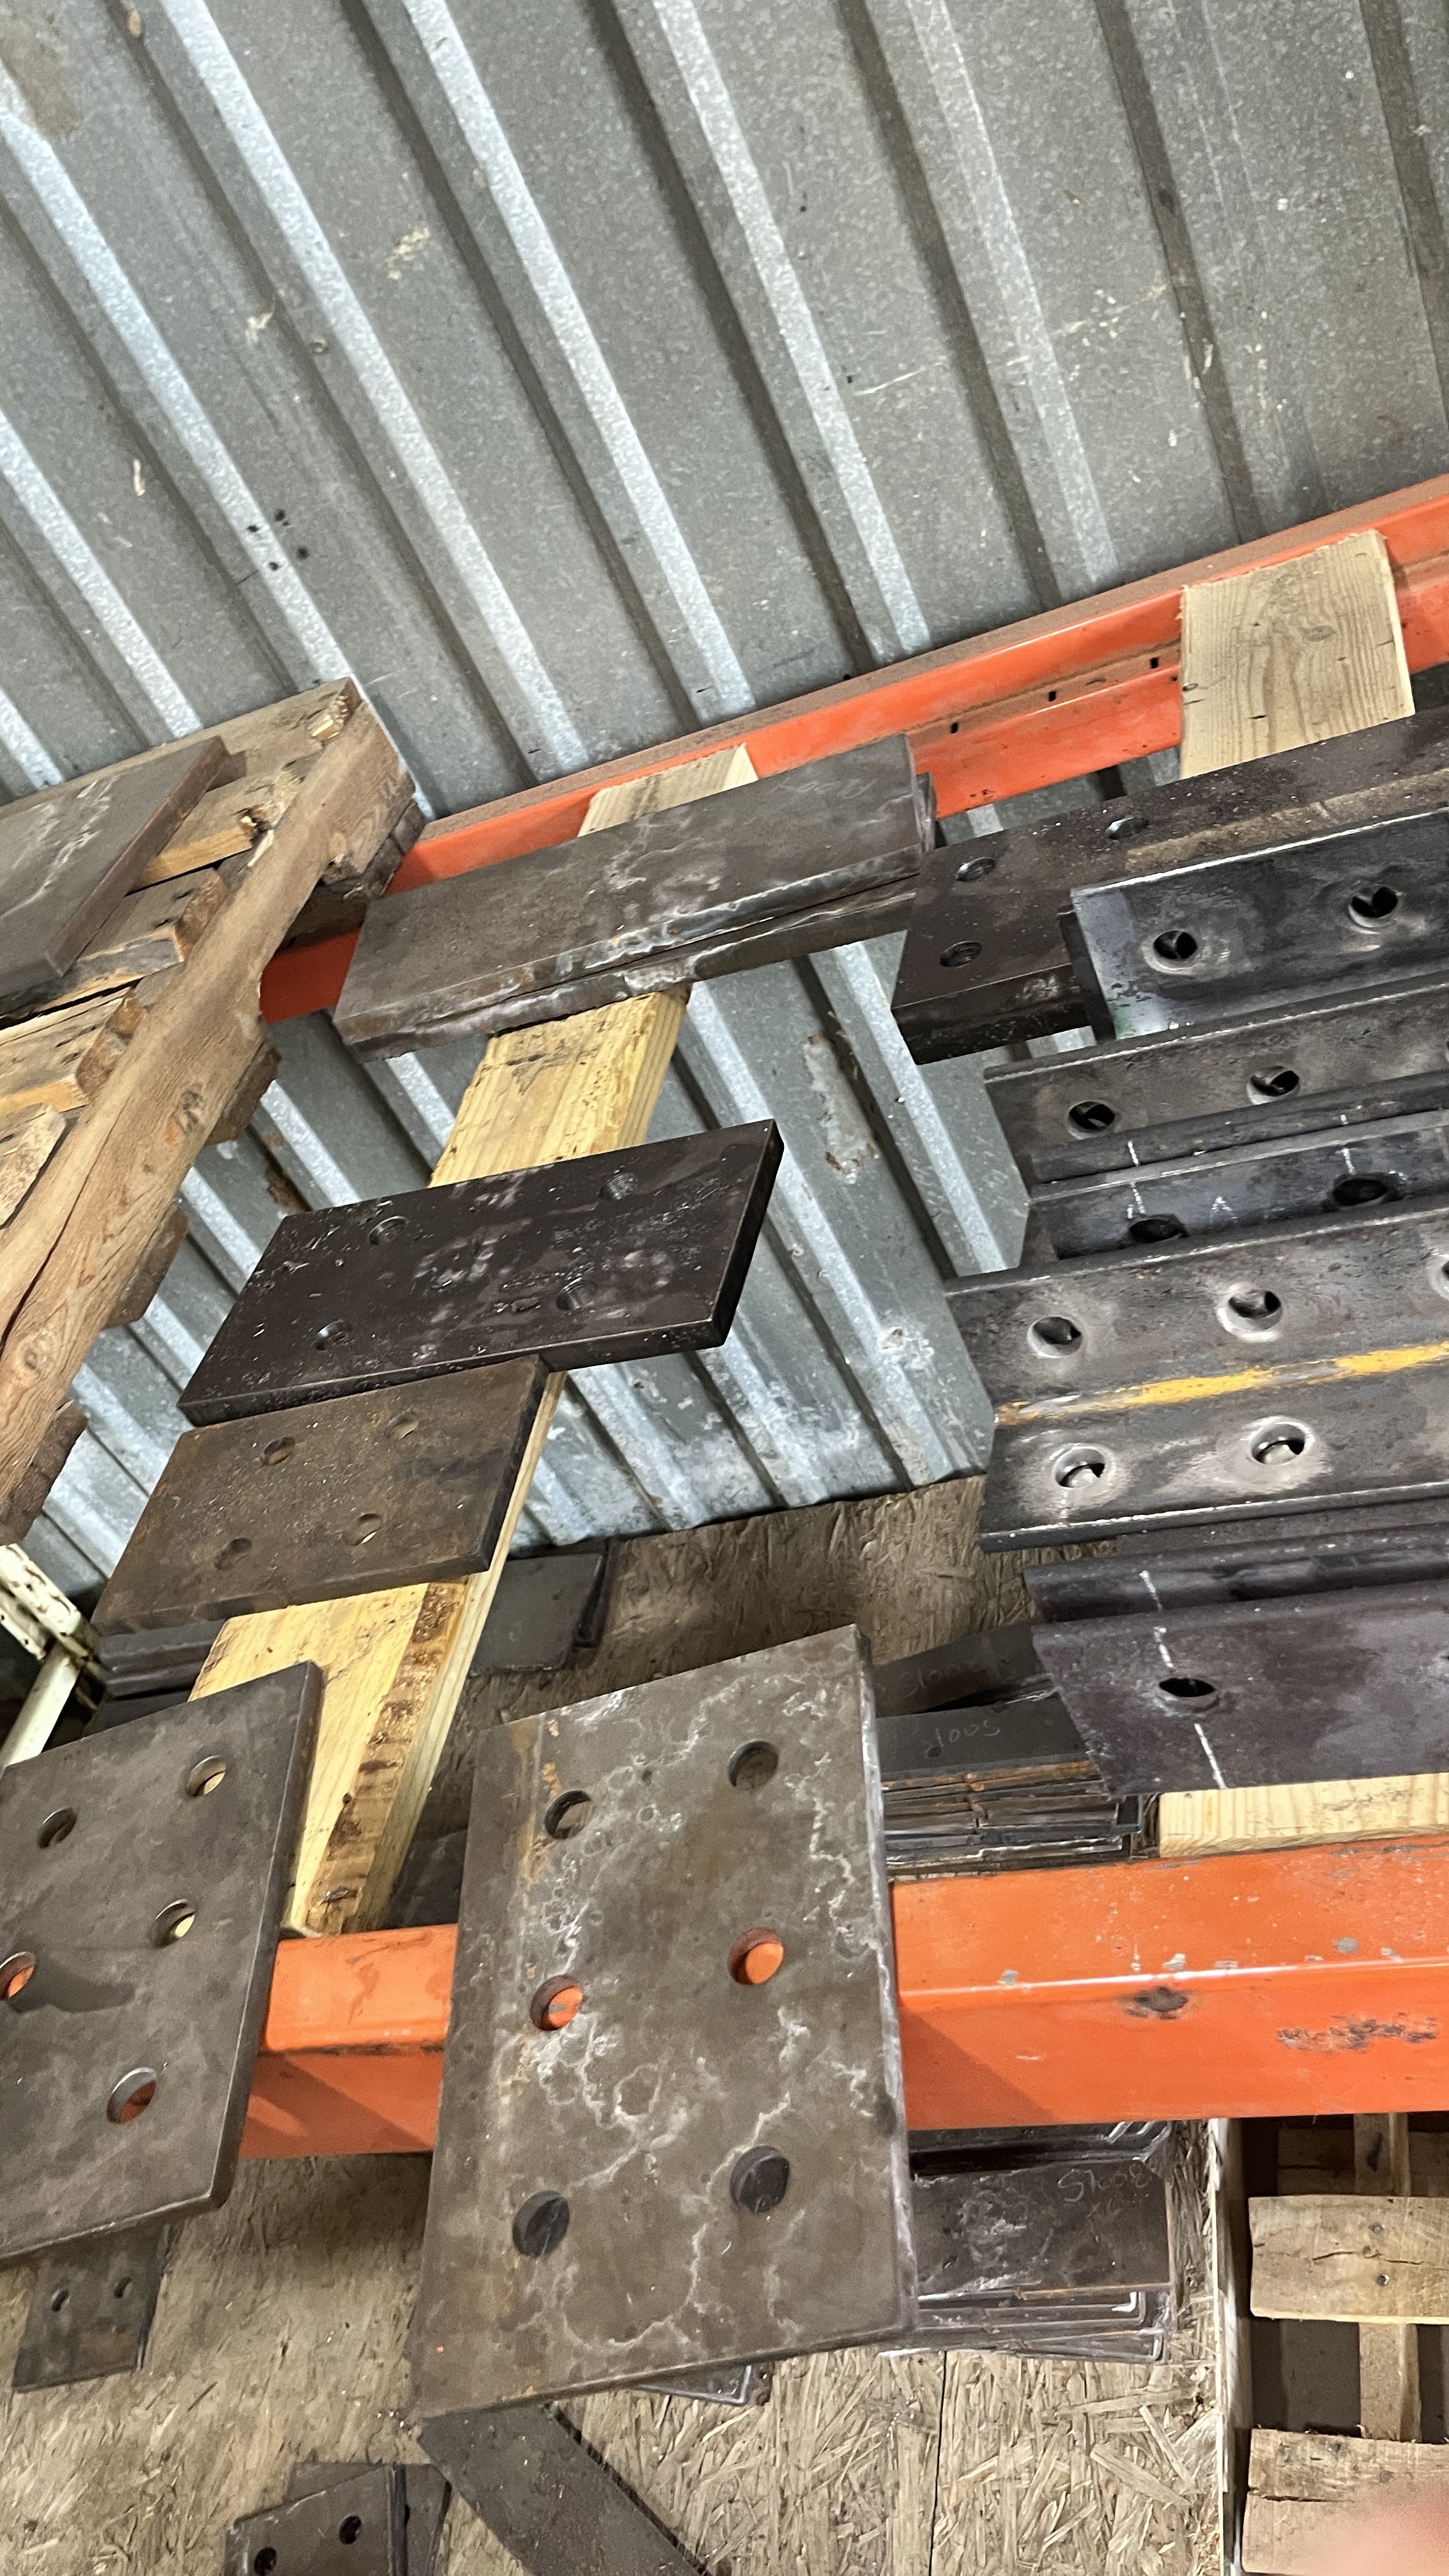
With the help of our CNC plasma cutting machine, we have made more than 200 plates of various sizes and shapes. Each plate has a specific place and size and is cut into various shapes and sizes. After all the plates have been cut, we will use the ironworker (steel punching machine) to punch holes into them, and then we will begin welding them onto the beams and tubing.
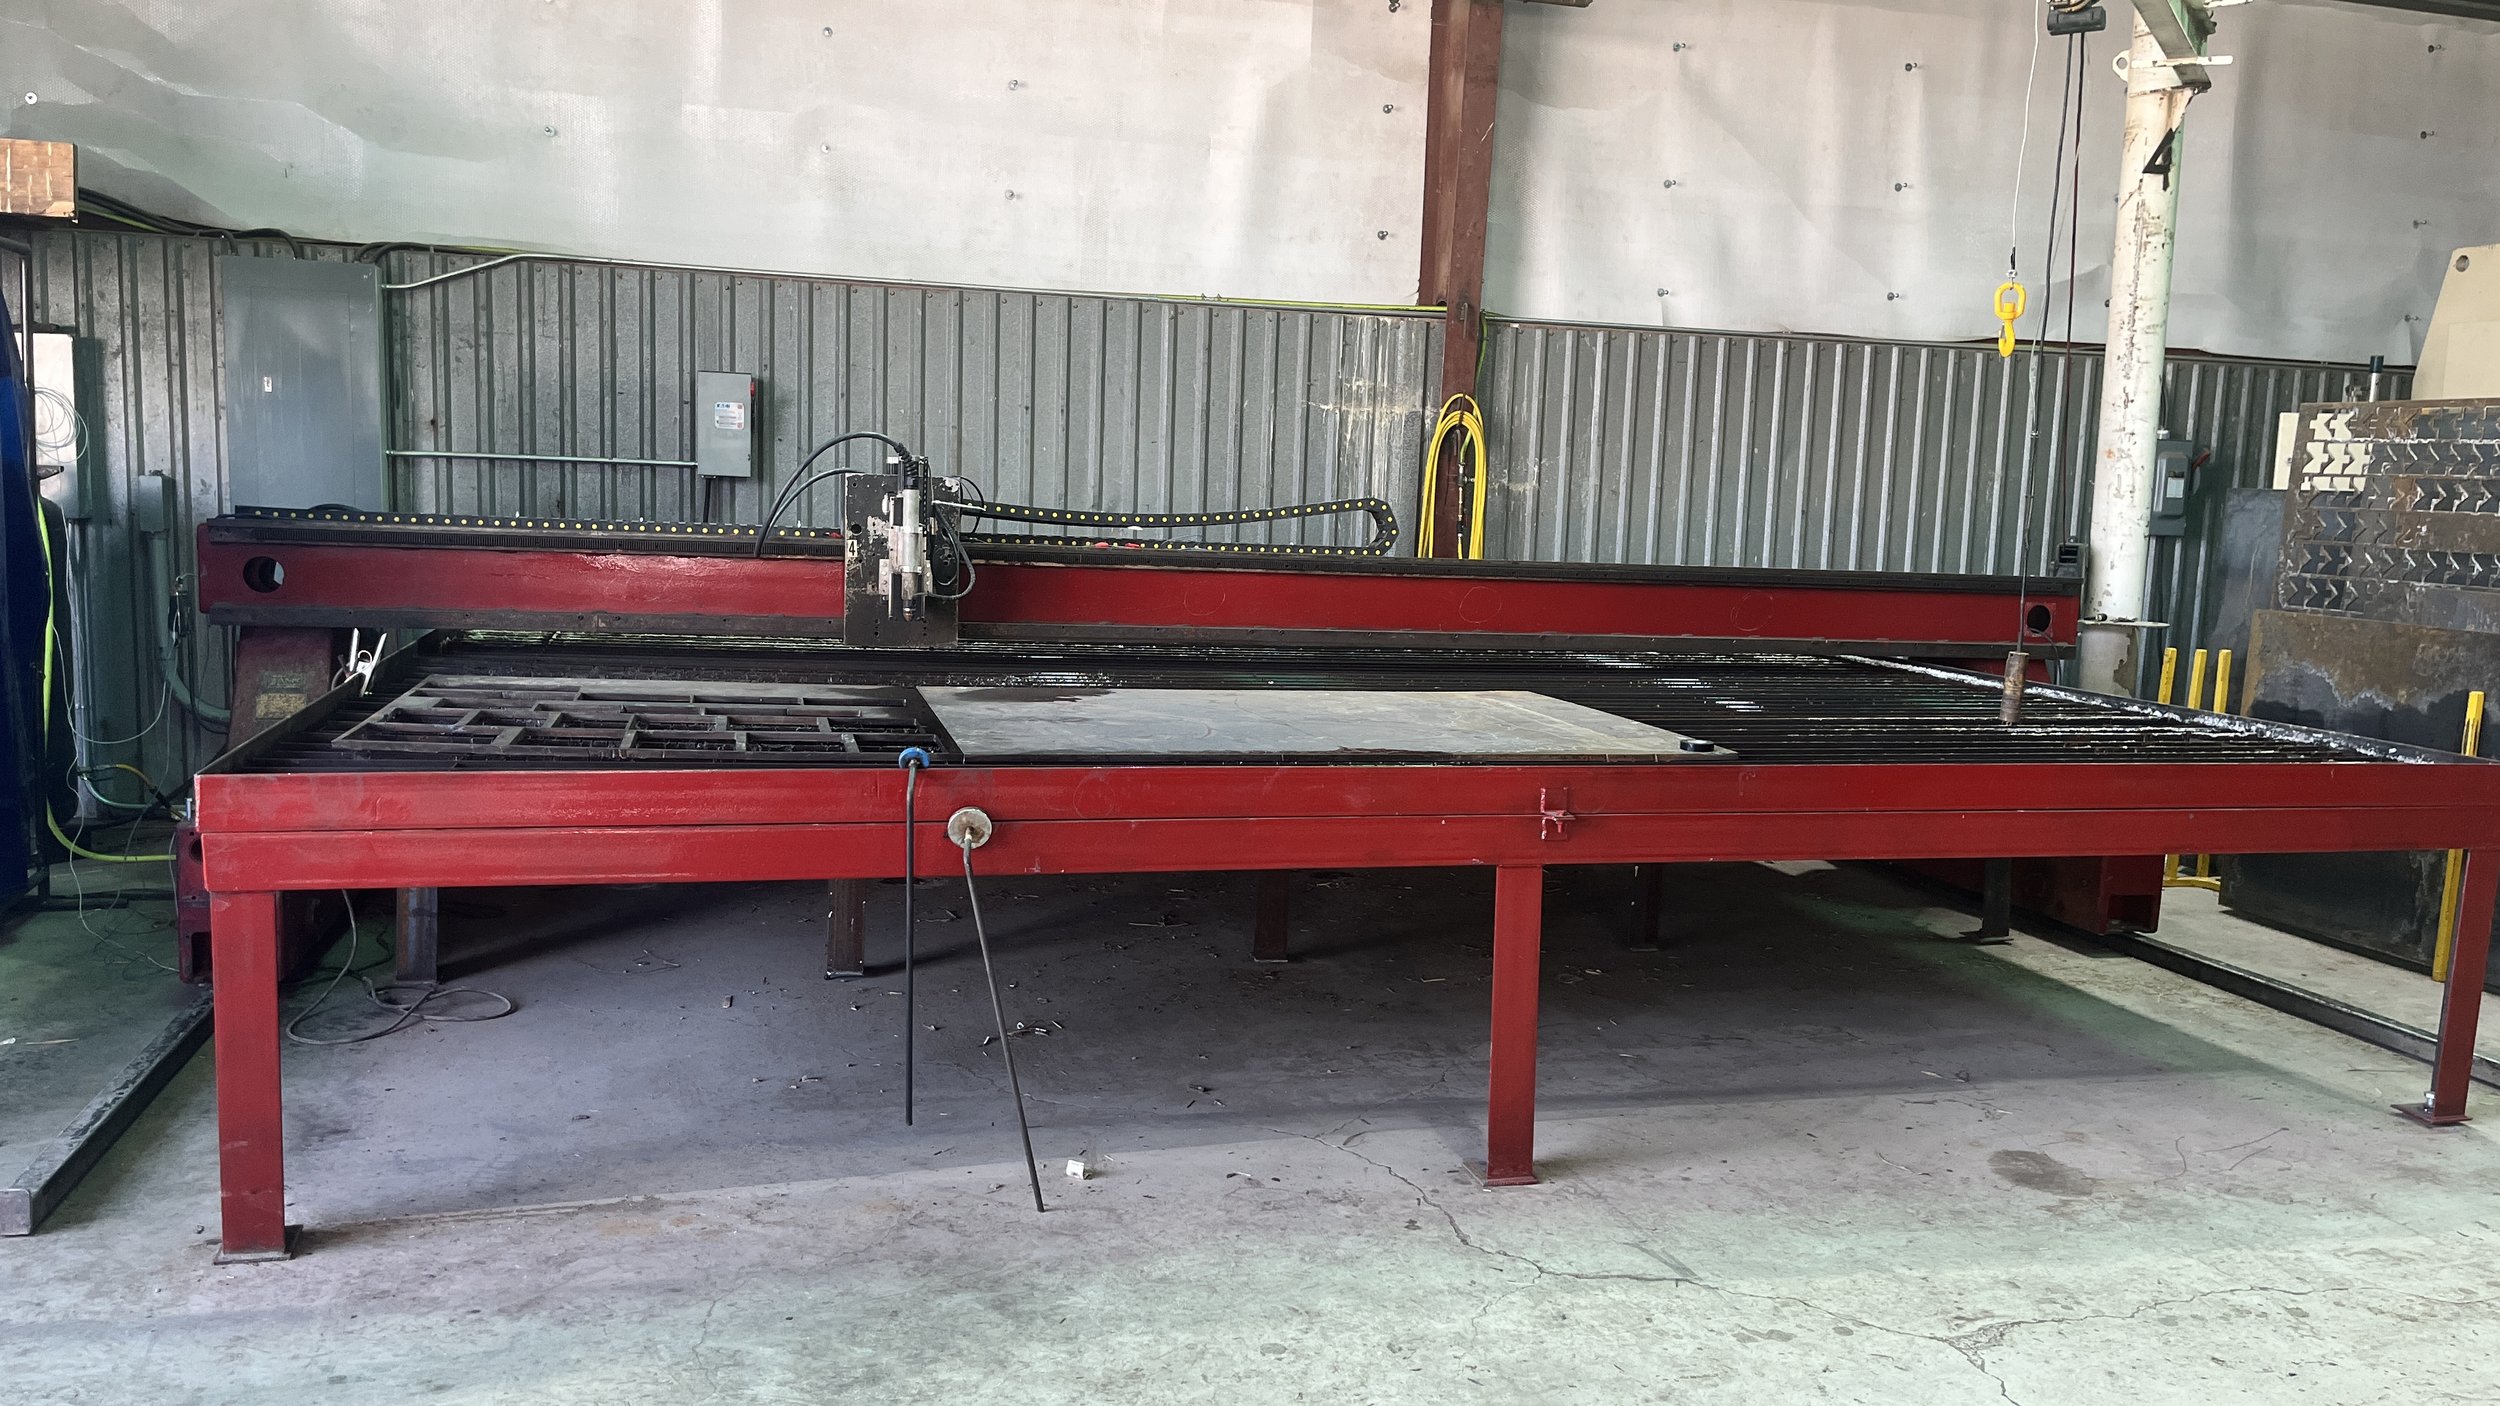
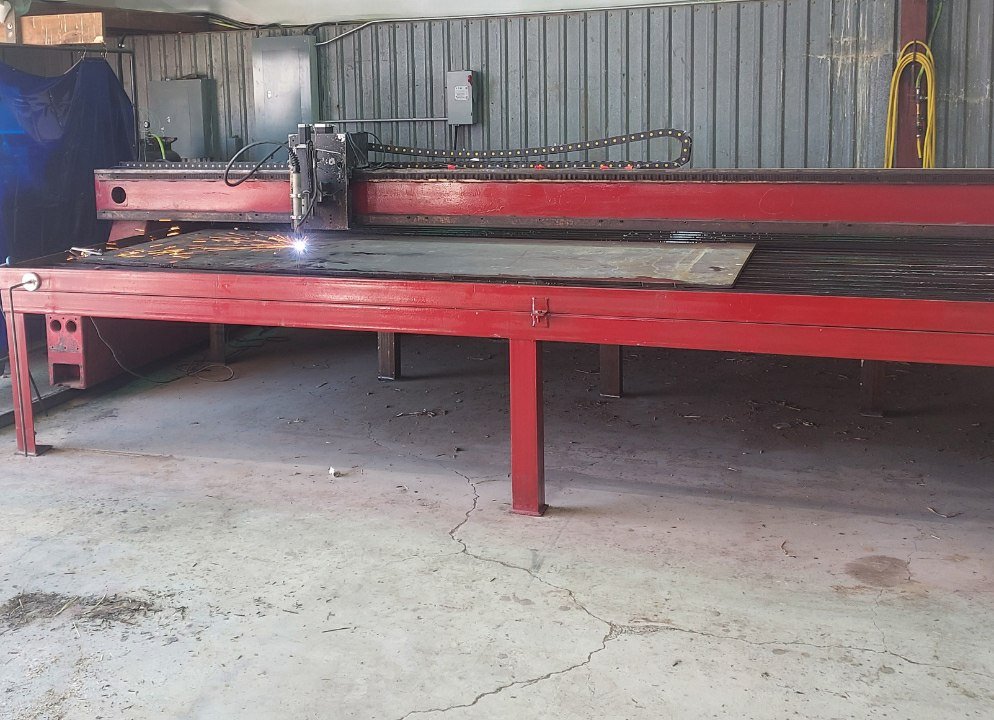
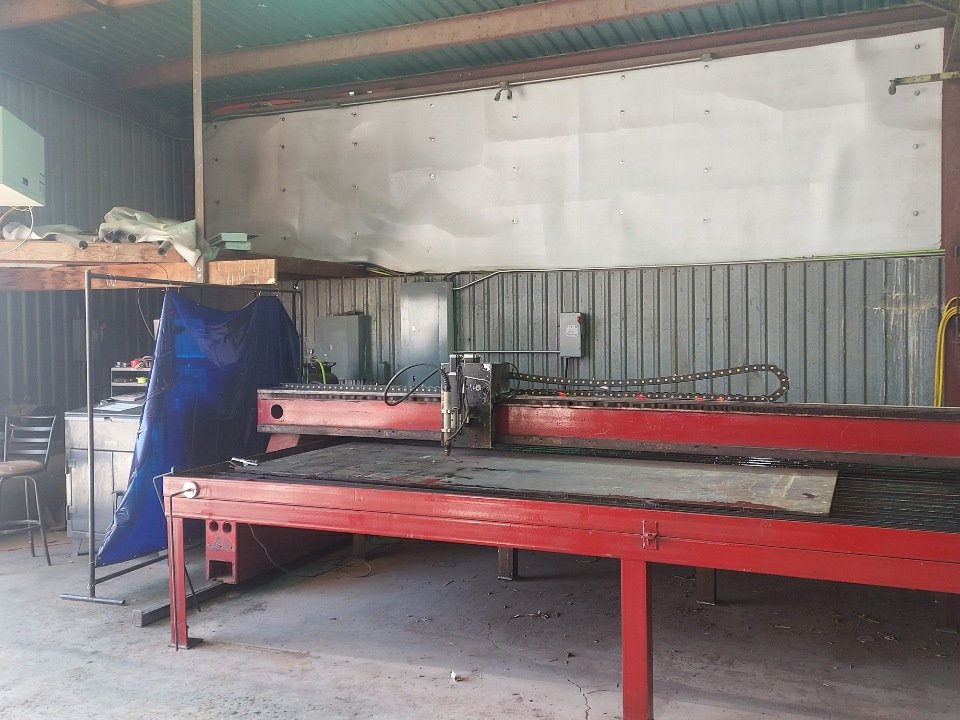
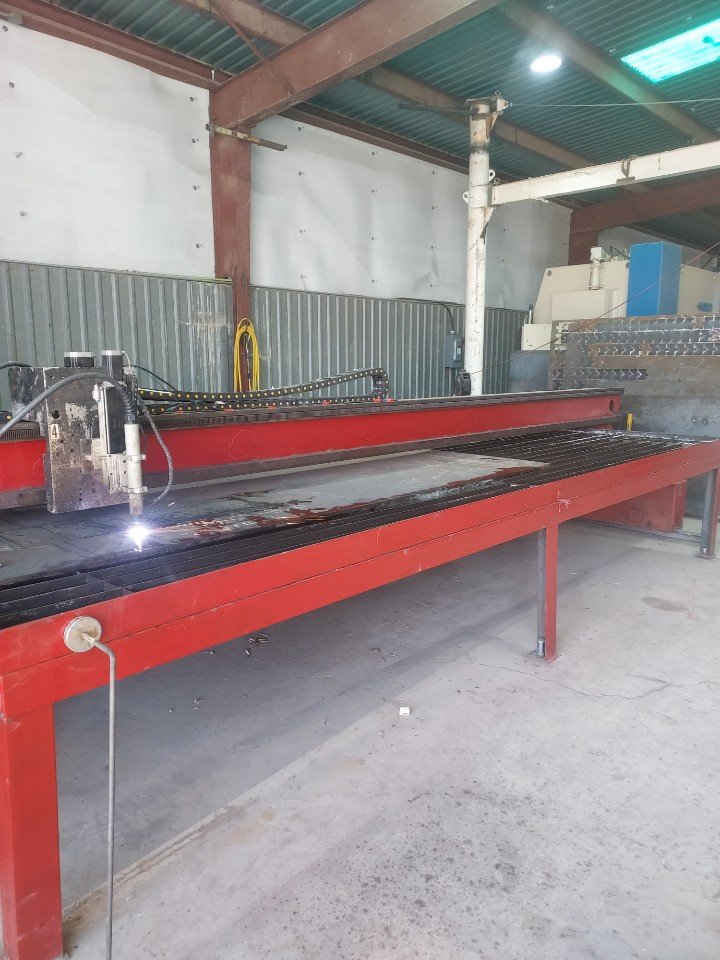
Plasma-Punch Machine Services
ES Denver offers steel projects as part of its scope of services. ES Denver uses a large format CNC plasma machine to cut steel. The bed can accommodate steel up to 8' x 16'. With the punch, the holes will be perfectly round and in the correct place.
In manufacturing and construction, a plasma cutting table is an efficient and versatile tool for cutting heavyweight and thick materials. The machine is controlled by a computer and helps to get an accurate cut. We save both time and money using the machine. Having the ability to cut up to 200 inches per minute, this machine is efficient. We can ensure that material sheets are used efficiently and that unnecessary material waste is avoided.
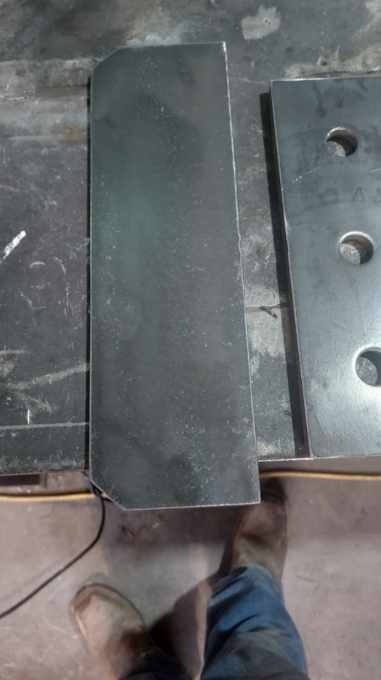
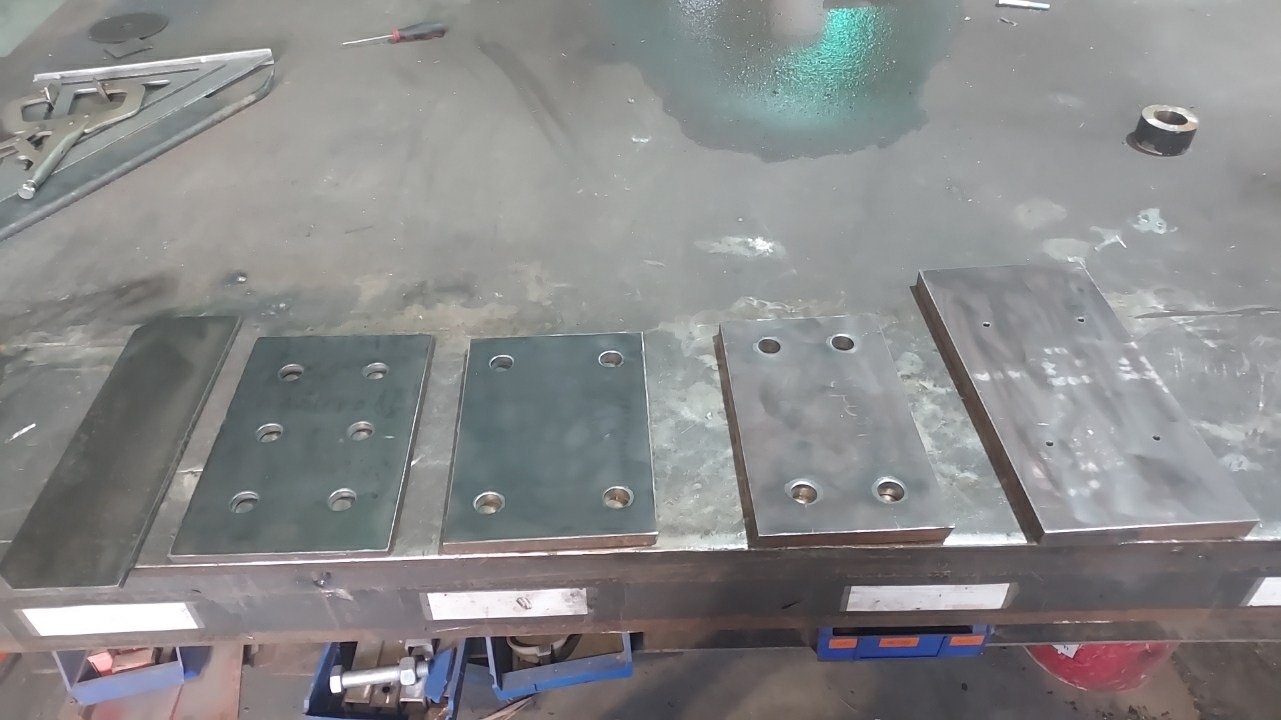
Plates that have been cut by our plasma table
Using 3D Scanning to Assess Structural Damage
At ES Denver we use cutting edge technology in our engineering inspections to assess structural issues with a property. The Matterport 3D Scanner is one example of the tools we use to gather data during a site visit.

Often it can be difficult to see if the walls of a building remain square or if they have shifted as a result of foundation or other structural problems. The high resolution 3D point cloud obtained from a scan allows any movement of walls to be quickly and easily detected and measured. In addition to providing fast and easy quantitative measurements, 3D scan data sometimes also uncovers additional structural problems that require a repair.

In the example above, a residence was undergoing foundation repairs. A previous engineer had estimated a wall to be 15” out of plumb, and the building was going to be condemned. But the 3D scan showed that the south wall of the residence was actually only 9” out of plumb, and a repair was possible. Using this data, ES Denver was able to design a cost effective repair plan for the homeowner to stabilize the foundation from further movement, and a historic building was saved.
At ES Denver we are committed to integrating the latest technology into our design process. Call us to day to discuss you project’s engineering needs.
Reframing the problem: A unique design for cantilever support
Recently, a client came to us with a difficult design problem. A building the client was constructing needed a cantilever beam to support the roof. Unfortunately, there was very little head clearance, and therefore not enough space to place a steel cantilever beam under the roof joists.
This required innovation.
The solution: A unique framing design that could provide adequate support while also providing enough head clearance. A traditional cantilever support consists of a beam that sits beneath the roof joists. In our design, the joists are made of 2 x 12 lumber which is notched to allow the steel beam to fit inside the joists, rather than sitting underneath them. This significantly increases the clearance of the beam.


This framing design allowed the client to proceed with the project.
As a client you may have design challenges that require a unique solution. At Engineering Studio Denver we are always up to the task. There is nothing we love more than a good engineering challenge! Call us today to discuss your project’s engineering needs.
Structural Integrity of Light Poles with Non-Invasive Testing
This month ES Denver was contacted to solve a unique problem for a customer. The customer’s property contained 18 light poles in a parking lot. One of these poles had fallen down due to rusting at the base of the pole. It appeared the pole had rusted from the inside due to water intruding and pooling inside the pole base. The customer wanted to know if any other light poles on the property had experienced internal rusting and needed to be repaired.

Detecting rusting and degradation of the steel inside the poles required a non-invasive testing method, as any invasive testing would damage the poles or allow water to intrude inside the pole base. ES Denver came up with a solution for the customer: use an ultrasonic metal thickness gauge to check the thickness of the steel in the remaining 17 light poles. The ultrasonic gauge is non-invasive and can detect the thickness of steel to the nearest 1/100th inch.

Using the ultrasonic thickness gauge to test the steel thickness of a light pole base.
The remaining poles were examined with the ultrasonic thickness gauge, with a minimum of 20 measurements taken around the base of each light pole. If the steel was measured at less than the required 1/8 inch thickness, this indicated likely deterioration of the steel from internal rusting.
Metal thickness data from each pole was plotted to determine how much of the base had experienced internal rusting.

An example of a pole which failed the structural integrity test and is showing deterioration of the steel in multiple sections around the base.
After carefully examining all 17 light poles, it was determined that 3 poles had experienced significant deterioration from internal rusting and were at risk of collapse. 2 other poles were found to be marginal. The other 12 light poles showed full thickness of metal around the entire base and were deemed to be structurally sound.
This analysis by ES Denver saved the customer money, as they can now proceed with repairing or replacing only those poles which showed internal rusting.
ES Denver is always looking for creative solutions to your unique engineering problems. Give us a call today so we can discuss your needs!
3D Engineering Observations
We are offering 3D scans for framing, rebar and as built observations. This allows us to document that the job was done properly. We can document your job beginning to end, document errors and fixes. Using this engineers can better communicate and improve turn around times for customers.

ESDenver adds Matterport's 3D Camera to Assist in Site Visits
Engineering Studio Denver has often gone to job sites and thought afterwards, “I wish I had got a picture of that” or something along the lines of “it would be nice to have this all documented to see progress of the project”. No matter how well we document a job, there is always one image in our mind that we may miss with our camera. That worry went out the door!
We have spent time recently trying to think of a different way to conduct site visits or how to re-walk a site without having to figure out the costs to us or the client for something minor. ES Denver’s founder, Dustin Randle, PE, came across Matterport’s 3D Camera that can be used indoors or outdoors allowing us to see mulitiple levels of a project whether a house/building is already constructed or to document from below ground to multiple stories high.
Less than a couple days into the purchase of this camera, we’ve been able to document some of the unique carnival rides we’ve done for Wisdom Rides, do a layout of Granada High School mechanical and structural layout to conduct site visits where we spend just as much time to document 20-50 images with just the Matterport’s 3D Camera giving us all those images and being able to re-walk the site.
ES Denver plans on using this camera for site visits, construction management and as an aid help train employees and help educate current and future clients what to expect from their project by showing our capabilities as if we are walking the site.
ES Denver looks forward to using this new tool to tell you more about the projects we have done and/or are doing going forward.

Pizza Nozzle for Emirates Airlines
Engineering Studio Denver (ESD) was visited at their office by Emirates Airlines who explained their need for a re-designed "pizza nozzle." Read more about how we redesigned the prototype.
Engineering Studio Denver (ESD) was visited at their office by a potential client who explained his need for a re-designed "pizza nozzle," the prototype of which he brought with him. This prototype, shown in the photo below, was machined from a solid piece of food-grade plastic.

It was being tested by Emirates Airlines at their food processing facility, presumably to extrude strips of pizza dough onto a conveyor belt prior to cooking. Tests showed that the opening in the nozzle was too wide.
ESD was contracted by this client to make a drawing of the re-designed nozzle for use in a 3D printer to make the nozzle.
The opening in the prototype nozzle was 0.09 inches x 5 inches. The opening in the redesigned nozzle is 0.09 inches x 3 inches, and the width of the body was changed accordingly to save plastic. The drawing of the re-designed nozzle is shown below.
ESD was loaned the original nozzle by their client. No drawings were provided. All the dimensions of the nozzle were to be measured and recorded. The shape of the nozzle made measuring it in order to create a fabrication drawing quite a challenge. Determining the size and specification of the threads on the nozzle proved to be the most difficult aspect of this project. The recorded dimensions were used to make the drawing of the re-designed nozzle, completed in approximately 5 hours, start to finish.
ESD contacted a 3D printing company, emailed them the drawing, and had the nozzle made from food-grade plastic. The new nozzle was retrieved from the 3D printing company by ESD's client.
ESD provided their client with the drawing of the re-designed nozzle and the specifications of the food-grade plastic used to print the nozzle.


Pop-Top Remodel Triples Living Space
Case Study: Engineering Studio Denver (ESD) was contracted by VERTEX to remodel a 1,500 square foot Denver, Colorado home. Learn more about our process.
Engineering Studio Denver (ESD) was contracted by VERTEX to remodel this 1,500 square foot Denver, Colorado home shown in the photo below.

This home was built in 1906 and has a crawl space, a cellar, and a basement. A second floor was added over a portion of the house in the 1950s or 60s.
Before remodelling could be done, the home had a number of structural problems that had to be addressed; all load-bearing interior walls had been removed, the floors were not level, the floor joists were over spanned, and 4x4 beams were used as joist supports. Antiquated methods of construction repair were used in an attempt to remedy these issues.
ESD designed a remodel for this home which included structural repairs. The over-spaned floor joists issue was solved by adding beams or tightening the joist spacing. Extensive repairs were designed to level the floor.
As part of the remodel, the existing second floor addition was demolished. Foundation walls were constructed on the south side of the house to increase the main floor area by approximately 750 square feet to a total of approximately 2,250 square feet.
A second floor was designed to increase the living area by another approximately 2,250 square feet, bringing the total square footage to approximately 4, 500 square feet. This is three times the original square footage of the home.
ESD also designed a 600 square foot, two car garage with living quarters in the second story above the garage for an accessible dwelling unit (ADU).
ESD designed the foundation and structural repairs to the existing home as well as the new foundation for the main floor extension. ESD also designed the structural members for the second floor and walls, and the structural members for the new roof. The remodel is shown during construction in the photo below.
In addition to doing all structural engineering, ESD provided all the drawings and the calculation package necessary to obtain the building permit from the City of Denver.
ESD supported design modifications made during construction of the remodel.

How To Apply For A Building Permit in Denver (and how ESD can help)
The thought of applying for a zoning or building permit can be daunting for anyone, especially when attempting to keep a project on-time and on-budget, arid a simple google search only adds to the confusion and frustration. To ease your frustrations and expedite the process, see our easy to follow guide below:
How do I apply for a permit?
There are two options to apply for a permit:
1) By Email (PlanReview@denvergov.org)
2) In-Person
Both can be complicated processes with many intricacies depending upon your scope of work so read carefully. Below is an overview of the steps, note that the Denver Department of Development Services provides thorough guidelines on their website.
There are two main types of Building Permits: Residential and Commercial.
RESIDENTIAL BUILDING PERMITS
Residential building permits are for single-family and duplex project. This applies to new residential construction, additions, attic conversions and other projects that include structural or excavation work such as structural remodeling, as well as zoning only reviews. Interior remodels, windows, doors, decks, detached storage, and other non-structural repairs which are considered "Home Project” do not require a building permit.
Here are the minimum requirements needed to submit your permit*:
Legal Address
Permit Application
Statement of Valuation Form
Plans:
Cover Sheet
Site Plan
Floor Plan
Building Elevations/Section
*Additional documentation might be required for certain projects including an Asbestos Inspection Form and/or Approvals from Landmark Preservation of Board or adjustments.
Pro Tip: If submitting by email, save all files as PDFs and make sure all email attachments use the following naming convention:
<DocumentName>:_<Address>_ <Date>
COMMERCIAL BUILDING PERMITS
All documents and plans prepared by an architect, engineer, or surveyor must be signed and sealed by that individual.
Hard copies submitted at the permit counter can have a printed seal but must have an original signature.
Emailed documents must have a valid electronic signature and a printed seal.
Download a step-by-step guide for creating electronic signatures if this is not something you have done before.
There are 10 Steps to getting a Commercial Building Permit:
PRIOR TO SUBMISSION
Use DevelopDENVER to look up your proposed development site.
Determine if you need to submit a Site Development Plan (SOP). SDPs are required for all new commercial construction, new residential construction of three or more units, and major additions or remodels.
To see if this applies to your project, contact the project coordinator listed for your site on the DevelopDENVER map in step 1.
Determine if you will need reviews or approvals from other disciplines.
Landmark
Zoning
Public Works
Right-of-Way
Address Assignment
Forestry
Ensure that your project will follow all local, state, and federal regulations. This may include having the site inspected for asbestos and lead based paint before applying for building permits, and finding a certified contractor to do abatement or remediation work as needed.
SUBMITTING PLANS FOR REVIEW
5. Assemble the items listed on either the New Buildings, Additions, and Change of Occupancy or Tenant Finish and Remodel forms (whichever form applies to your project) contained in this guide.
6. Determine whether you will need to log in your plan review or if you will be able to obtain a permit at the commercial/multifamily walk-through counter.
BUILDING FEES
7. Fees are based on customer-provided valuations for the scope of the project, including materials, labor, overhead and profit. These valuations are checked against construction costs prepared by the International Code Council or similar resources, and additional fees may be assessed if the customer-provided valuation is found to be below current construction costs. Once your project has been logged in, you will receive a log number and instructions for how to pay plan review fees. The review will not begin until review fees are paid.
DURING PLAN REVIEW
8. Your project will be assigned a log number. Depending on your project scope, plan review may include multiple disciplines, such as electrical, plumbing, architectural/structural, mechanical, fire, transportation, environmental health, and wastewater.
9. Use your log number or site address to check your application status online.
10. Before your plan review is complete, provide staff with the name and license number of the contractor who will be associated with the building permit for your project. This will allow you to receive the building permit by email once all reviews are complete and final permit fees are paid.
Help! I need a permit immediately.
There are two scenarios in which you may be able to receive a Commercial Same-day Permit:
Quick permits for simple projects like re-roofs, minor electrical work, and like-for-like mechanical or plumbing replacement
Commercial/multifamily walk-through for projects valued under $500,000 that do not require structural work, change of occupancy, or a review by disciplines other than electrical, mechanical/plumbing, architectural/structural/access control or fire
How do I get my permit?
Plans can be brought in by anyone, but permits will only be issued to a contractor licensed for that work in Denver.
Make sure the person picking up the permit can demonstrate the validity of the contractors' license on the permit application by bringing an original contractor license card (no copies or faxes accepted), company check, or company credit card.
While the process of applying for a building permit can be daunting, breaking it down into smaller, more manageable pieces and following the checklist provided by Denver Development Services will ensure you are well prepared with what to expect and can anticipate potential road blocks.
Engineering Studio Denver can help provide all engineering documentation and support for residential and commercial structural changes. Contact us with any questions regarding what you may or may not need to move your project forward.